Back up Microsoft Teams
This chapter covers the following topics:
- Prerequisites
- Getting Started with Teams Backup
- Browsing the Teams Backups
- Back up Teams
- Restore Teams Files
- Delete Files from Teams Backup
Prerequisites
To back up Microsoft Teams channels, posts, and files, make sure you have a valid subscription including a SharePoint/Teams license. A SharePoint/Teams license is required for every domain to back up SharePoint and Microsoft Teams on this domain.
To learn more about licensing, refer to the Licensing chapter.
Getting Started with Teams Backup
To enable Microsoft Teams backup, click Configure Backup on the dashboard, then turn on Teams backup services.
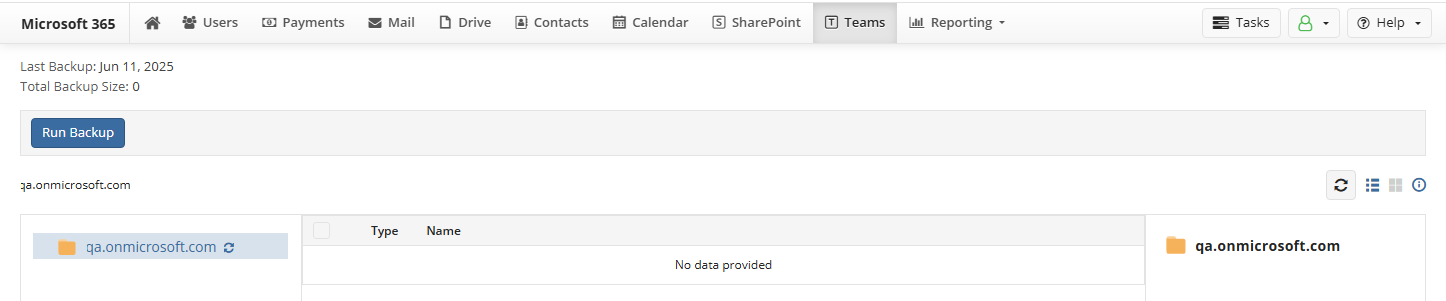
To create the initial backup, click Save. The backup task is created and will be scheduled automatically. You can monitor the backup task processing using Task Manager.
Once the initial backup is completed, you can view a list of backed-up items.
During every backup run, the latest file version is backed up. It is not possible to back up all file versions in one run.
Browsing the Teams Backups
The Microsoft Teams backup structure looks as follows:
- Each team contains a list of channels
- Each team channel contains its posts and files.
- To view a list of posts of a particular channel, click Posts.
- To view a list of files of a particular channel, click Files.
Microsoft 365 / Google Workspace backup currently supports Microsoft Teams channels, posts, and files backup.
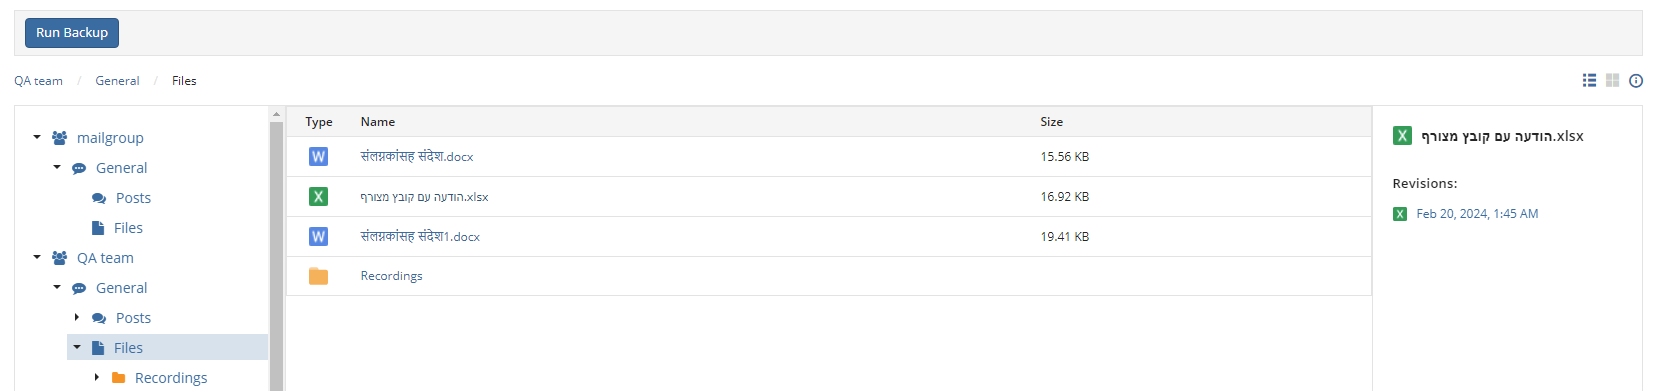
Note that Microsoft Teams files are kept on the SharePoint side. To back up Microsoft Teams files of a team, enable the SharePoint backup for the team first.
Back up Channels, Posts and Files
To run backup, select Teams in the horizontal menu bar. By default, Teams backup is performed three times per day automatically. To start an urgent backup for the selected user, click Run Backup.
You will be notified about the backup job creation event. You can monitor the backup task processing using the Task Manager.
Restore as a New Teams
You can restore any Team as a new Team, containing posts from all selected channels. To restore a specific Team as a new one, including selected channels, perform the following:
On the Teams tab, expand the root folder in the left panel.
Select the required Team. You can find a necessary file or folder by filename or part of the filename. Type the search expression in the search box above the grid and click the search icon.
On the middle panel, select all the channels or the required channels only.
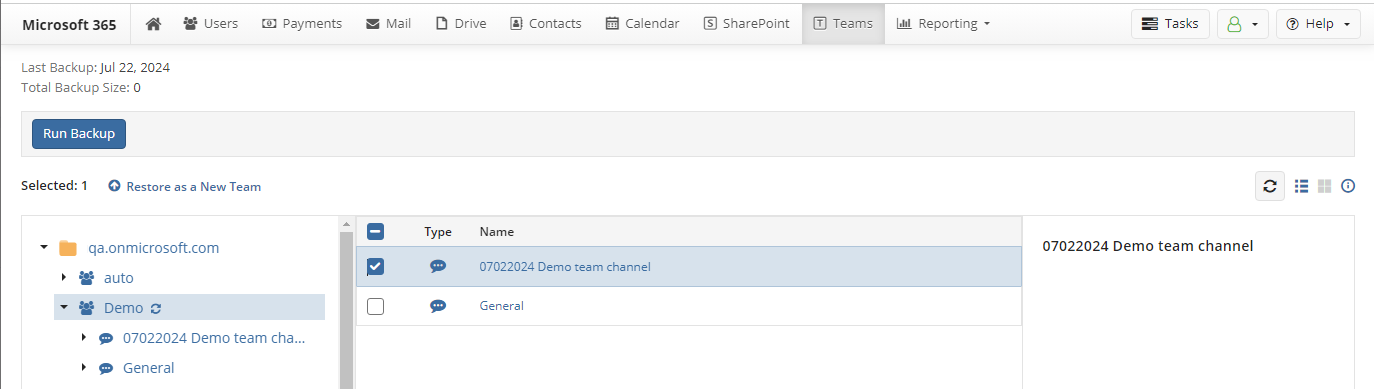
- Click Restore as a new Team.
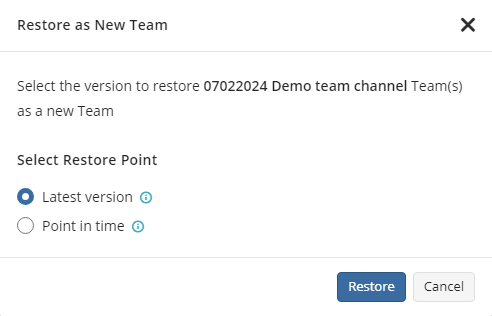
- Select the restore point: the latest version or a point in time.
- Click Restore.
The new Team will be named as follows: %original Team name%restored%restore date%.
By default, any Team will have a General channel. If the original General channel was not selected for restore, the General channel appears in the restored Team, but this channel will contain no content.
Files attached to posts cannot be restored along with channels and posts. To restore such files, refer to the Restore Teams Files section. Note that files restored using SharePoint resources remain detached from the posts these files were originally attached to and can be used for information purposes only.
All restored Teams will be included in the backup along with original Teams. It is recommended to delete the restored Team in Microsoft Teams when it is no longer needed to improve backup performance and save storage space.
Restore Teams Files
Microsoft Teams files are stored in SharePoint, so they can be restored using the SharePoint Restore feature.
Microsoft Teams files can be downloaded from the SharePoint backup as well as the Teams backups.
To download a file, browse the backup content, then click the particular file to view its revision list. Revisions appear to the right. Click the required file revision to download it to the Downloads folder.
Delete Files from Teams Backup
Microsoft Teams files are stored in SharePoint, so they can be deleted using the SharePoint Delete feature.