Select Partitions
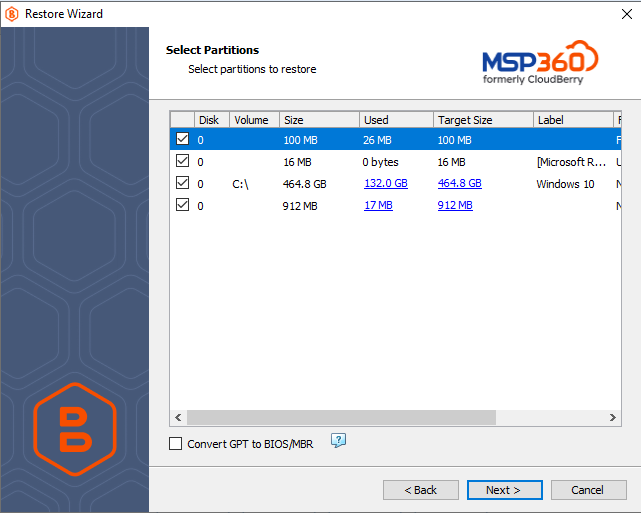
On this wizard step, select partitions to restore.

Note that selected partitions must include system volumes as they contain data required for booting the operating system.
Do not exclude recovery partitions unless you are restoring an image to an Elastic Block Store (EBS) Volume
- If you selected the Restore as physical disk option on the Restore Type step, the restore wizard enables you to select partitions only.
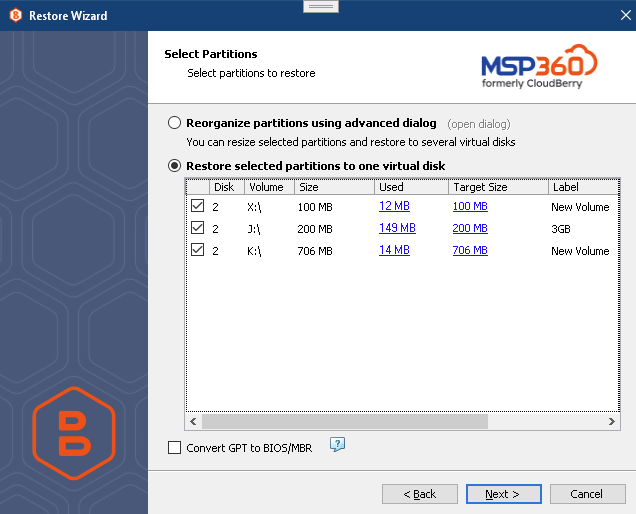
- If you selected the Restore as virtual disk option, the restore wizard enables you to select the following options:
- Reorganize partitions using advanced dialog. Select this option to open the Resize Partitions dialog box
Note that in case you selected the Reorganize partitions using advanced dialog, the Convert to MBR option is unavailable

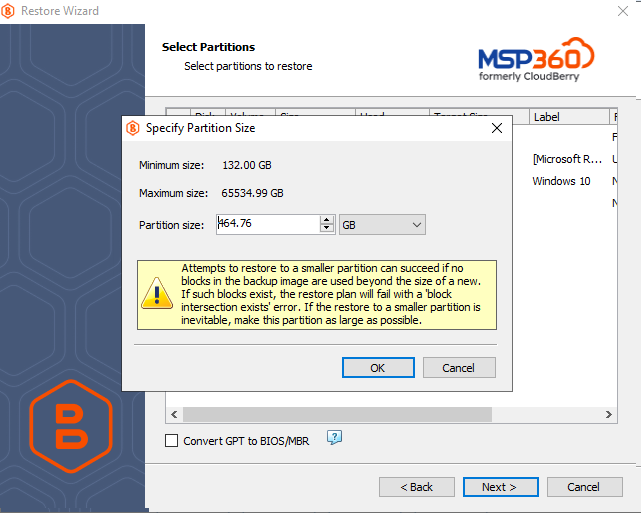
If an NTFS partition is selected in the restore plan, you are enabled to resize partitions. To learn more, refer to the Resizing NTFS Partitions chapter.
Note that UEFI/EFI partitions are not supported by most cloud storage providers (such as AWS, Miscrosoft Azure and Google Cloud)
Convert to MBR Option
In case you need a BIOS boot partition, convert a GPT disk to MBR. To convert GPT volumes to MBR, select the Convert to MBR check box.
Note that Convert to MBR option is not supported on the following operating systems:
- Windows 7
- Windows 2008.
Note that it is not possible to select more than one Windows Basic Data volume for conversion to MBR
To learn more, refer to the Convert GPT Disks to MBR chapter.
Resize Partitions
This feature allows you to change the restored partition size.

You can add virtual disk to restore partition to it.
- In the Resize Partitions dialog box, click Add Virtual Disk.
- In the Add Virtual Disk dialog box, specify the disk name and the size, then click OK.
- Once a new virtual disk i screated, drag the required partition down to the virtual disk area, thenk click OK.
Once you are done, click Next.