Recovery Media for Bare Metal Restore
To perform a bare-metal recovery, you need to create a bootable USB or ISO image file on a computer running Windows. This bootable media will contain a pre-boot environment, and the backup data for restoration will be retrieved from the backup storage specified in your image-based backup plan.
This chapter covers the following topics:
CloudBerry Backup runs under the Local System account by default. If another account is used note that this user must be granted local administrator permissions to be able to create a recovery disk
Create a Recovery Media
- Open the Backup Agent.
- Verify Backup Storage:
- On the Backup Storage tab, ensure that the storage account associated with the image-based backup is correctly configured with the correct backup prefix. You will need to use the same backup prefix during the recovery procedure on the target machine.
- This step can be done later, but it may be more convenient to do it now to avoid issues in the pre-boot environment.
- Insert the USB Drive you want to use as a bootable recovery medial.
- Run the Backup Agent and click Create Bootable USB.

- In the Create Bootable USB dialog box, specify recovery media options. The following options are available:
- USB Drive. Select this option to create a bootable recovery media on a USB drive, then select the target USB drive. By default, the device with minimal capacity appears first in the list. Note that the bootable USB contains only a preboot environment, backup data for restore is to be downloaded using an internet connection.
- ISO Image. Select this option to create a recovery image in ISO format, then specify the path to save it.
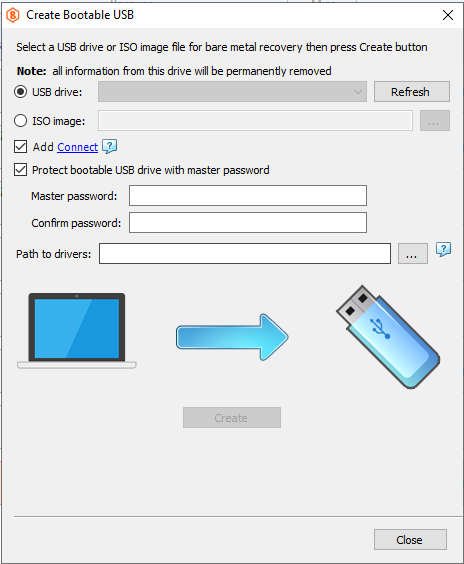
Note that all information on a USB drive will be permanently lost once the recovery media creation is started
In case a USB drive is not visible in the backup wizard, use Windows Disk Management or any similar tool to make sure that the target USB drive is properly partitioned. For example, if a USB drive was previously used as a Mac or Linux boot device, clean this drive and create any partition on it (FAT32 by default)
- Add Connect (optional). Select the Add Connect check box to include the Connect application on the bootable USB drive.
- Set a master password. You will be prompted to protect the recovery media with a master password for security. It is recommended to create a strong password and store it securely.
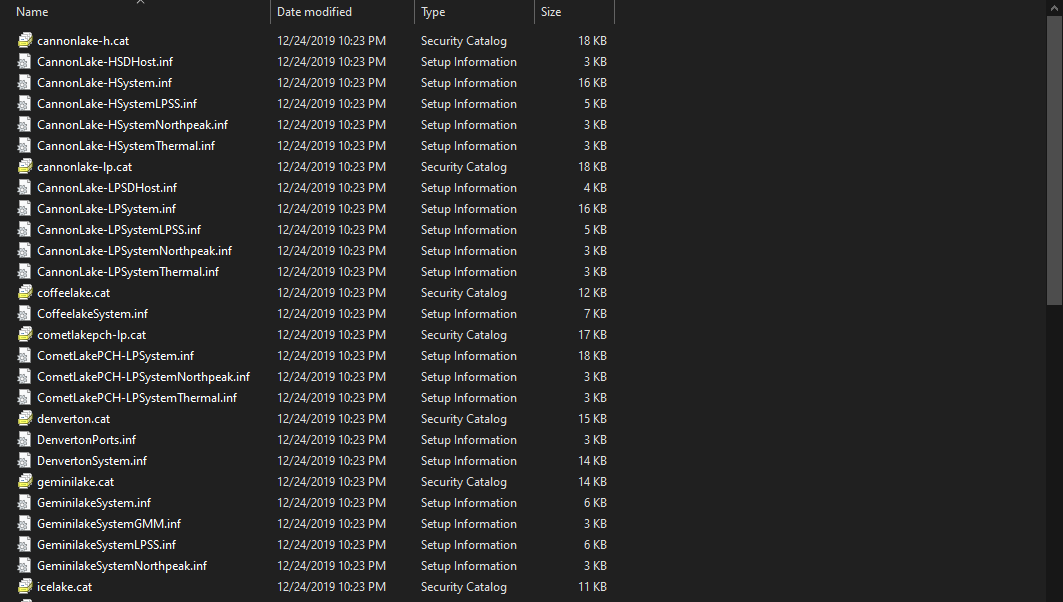
- Add specific hardware drivers (optional). If your system requires specific drivers, collect them in a folder and specify the path in the Path to drivers field.When adding drivers to the recovery disk, only INF, CAT, and DLL files are supported. Driver packages provided by vendors in ZIP, RAR, 7Z, or EXE formats cannot be used directly. The INF files are essential, as they reference all necessary driver files. To simplify the process, you can organize the drivers by placing them in separate subfolders within a main folder. The selected folder will be scanned recursively to include all relevant driver files.
Example: These files will work properly:

These files will not work properly:
- Click Create.
- If prompted, download and install both Windows ADK and Windows PE add-on. Refer to the following Microsoft documentation for instructions on how to choose the right set for your environment.
- In most scenarios, it is recommended to select Windows ADK 10.1.26100.1 (May 2024) and the Windows PE add-on for this ADK support the following OS releases:
- Windows 11, version 24H2 and all earlier supported versions of Windows 10 and 11
- Windows Server 2025, and Windows Server 2022
- To get required software:
- After all tools are successfully installed, click Create again.
- In most scenarios, it is recommended to select Windows ADK 10.1.26100.1 (May 2024) and the Windows PE add-on for this ADK support the following OS releases:
- Once USB drive creation is complete, click Close. Your USB device now contains the necessary boot files in the folder called Boot.
Configure Network Share and Local Accounts
The recovery media will include information about all accounts that are currently available in MSP360 (CloudBerry) Backup and you will be able to restore a disk image from any of these accounts after booting from the recovery disk. The available accounts are listed in the application's main menu.
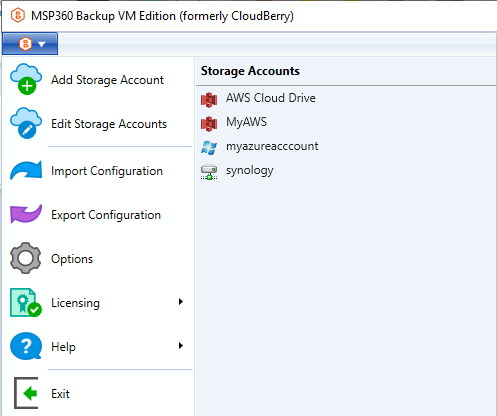
To make it easier to restore a disk image from a network share, we recommend that you configure a corresponding network account before starting the recovery media creation process.
To specify valid credentials so that the recovery media is able to access the network share, switch to the Tools tab on the application's menu and click Network Credentials.

When using a Local File system account, please keep in mind that the recovery media might change the drive letter in the path string. To configure the local account after booting from the recovery disk, run MSP360 (CloudBerry) Backup from the bootable USB drive and click Edit Storage Accounts in the main menu. In the Storage Accounts dialog, select your drive storage account, expand actions and click Edit.
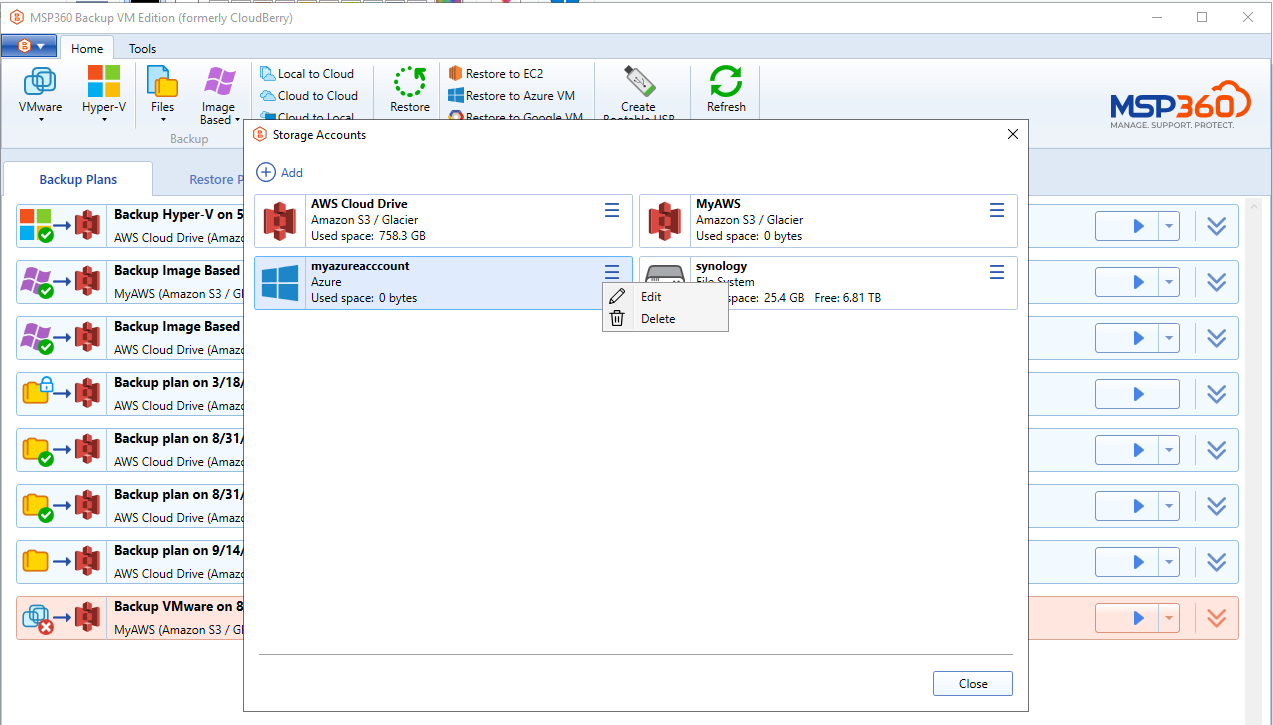
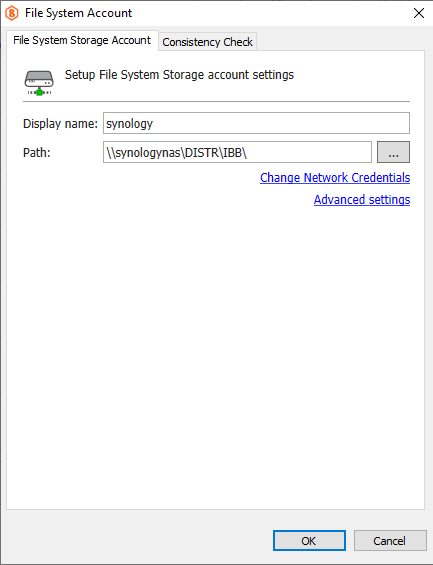
In the File System Account dialog, you can check whether the application can access the storage location by clicking the ellipsis button for the Path input field.
To learn about emergency system recovery, refer to the Bare Metal Recovery chapter.