VMware Virtual Machine Restore Plan
Backup for Windows offers restores of VMware virtual machine backups to different destinations including:
- Restore to vSphere
- Restore to EC2
- Restore to Azure VM
- Restore to Google Cloud Instance
- Restore as virtual disk
This chapter covers the following topics:
- Plan Name
- Select Backup to Restore
- Restore Point
- Restore Source
- Restore Type
- Select Virtual Disks
- Select VMWare Host Server
- Restore Options
- Restore Virtual Machines As
- Schedule
- Pre / Post Actions
- Notification
- Check Network Shares
- Summary
Create Restore Plan
To create a new restore plan, click the Restore icon in the horizontal menu bar.
Plan Name
Select whether to run the restore plan once or save the restore configuration for further use.
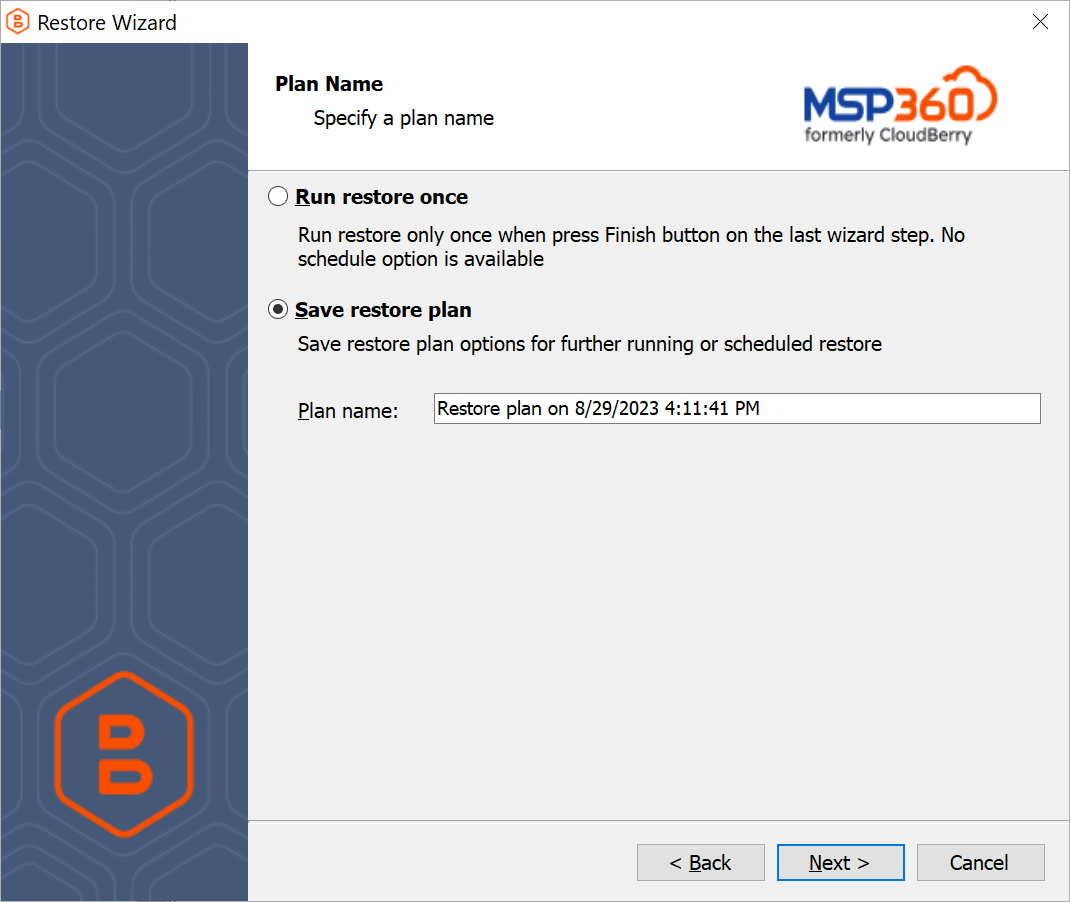
Click Next.
| Top |
Select Backup to Restore
Select a backup plan that contains the dataset to restore. Entries are named after backup plans previously created and executed.
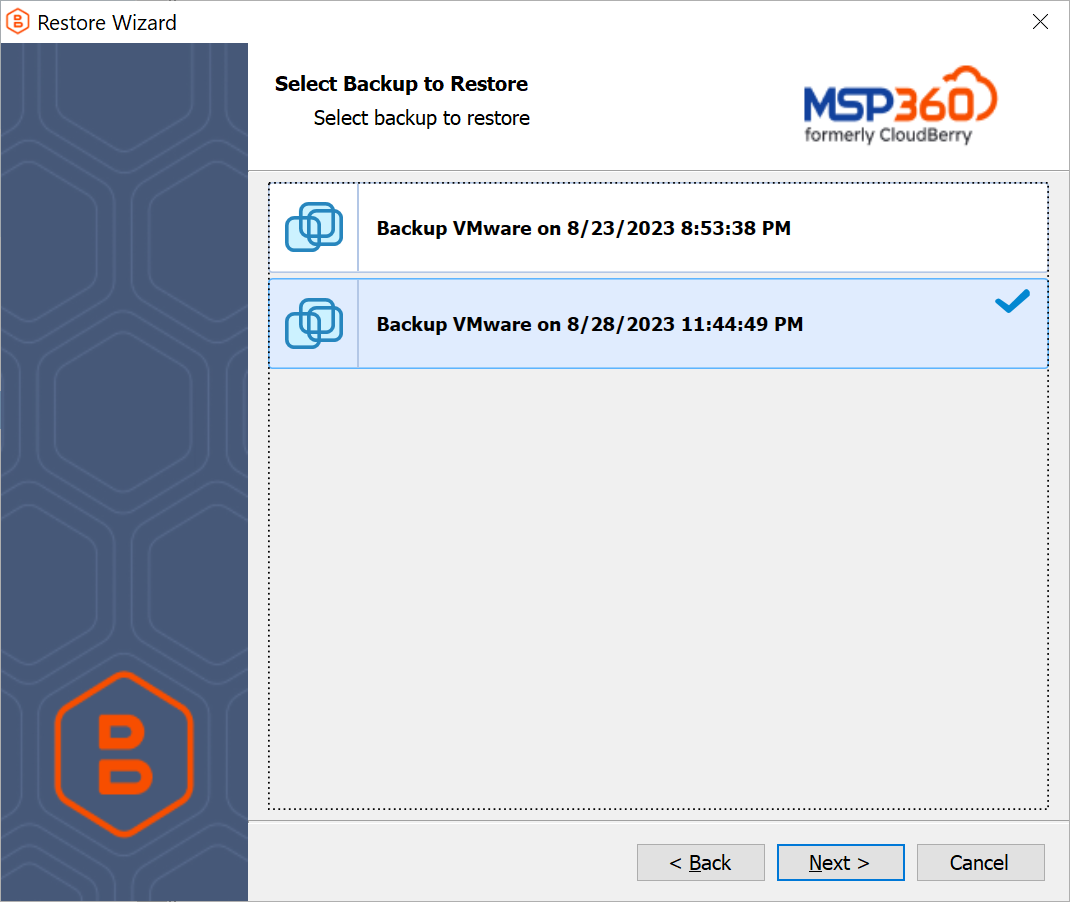
Click Next.
| Top |
Select Restore Point
Select the required restore point for the plan. You can select the latest available restore or select the required one manually from the list.
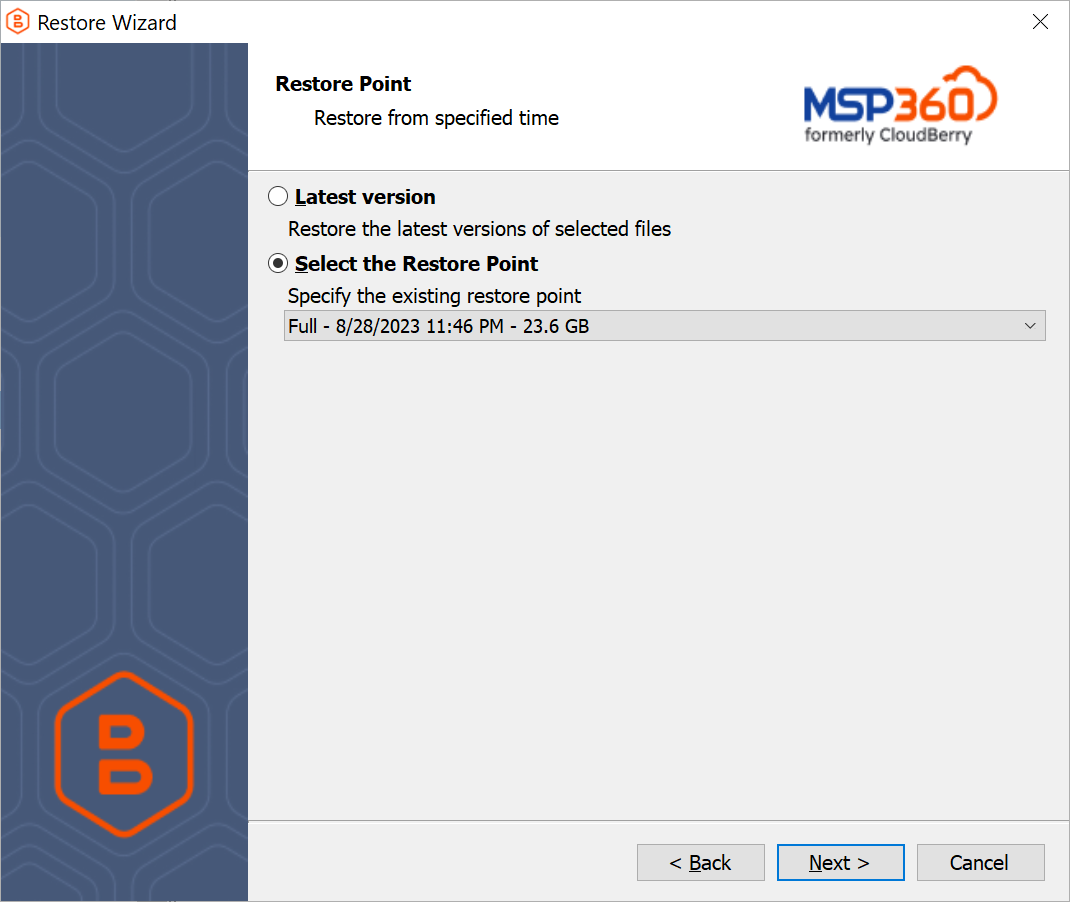
Click Next.
| Top |
Restore Source
Select virtual machines to restore from the list.
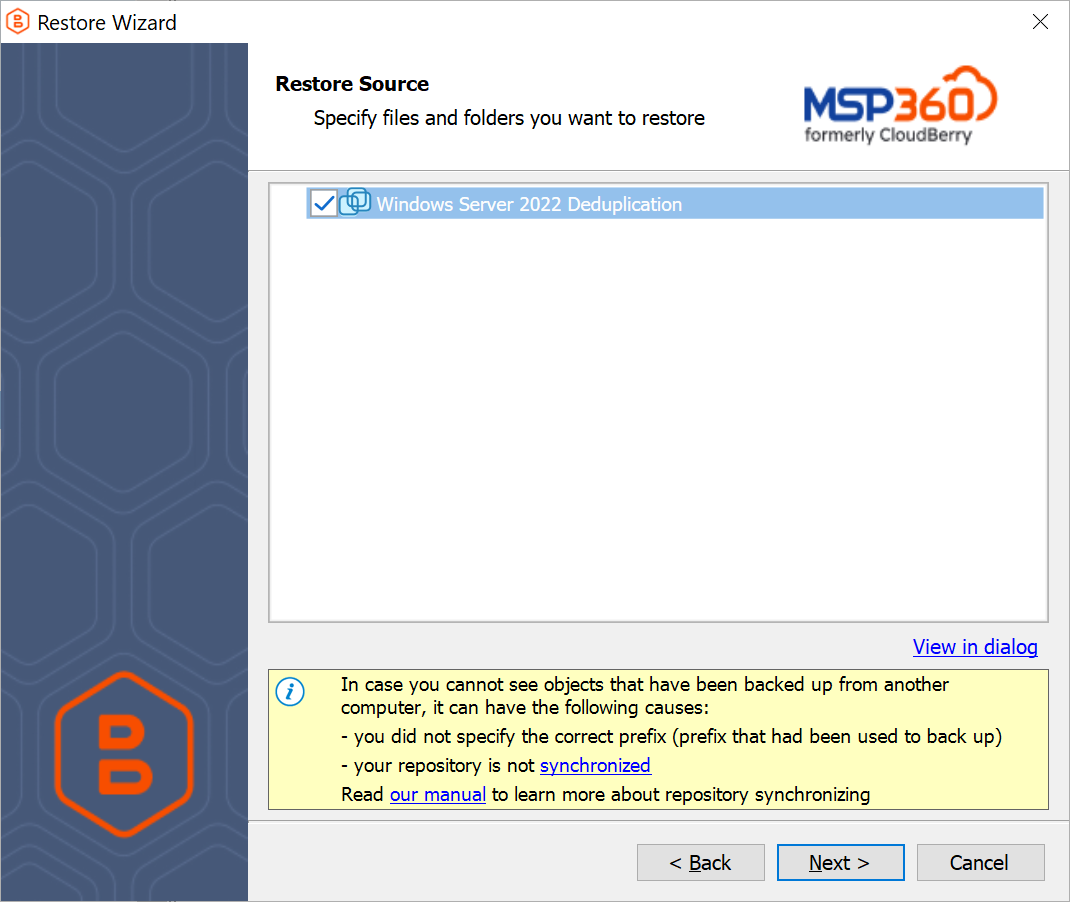
If you select multiple VMs, only restore to vSphere is available. To restore to other destinations (AWS EC2, for example), create separate restore plans for separate VMs
Click Next.
| Top |
Restore Type
This step displays all possible restore types that are available for backups currently stored in backup storage. Select VMware Virtual Machine.
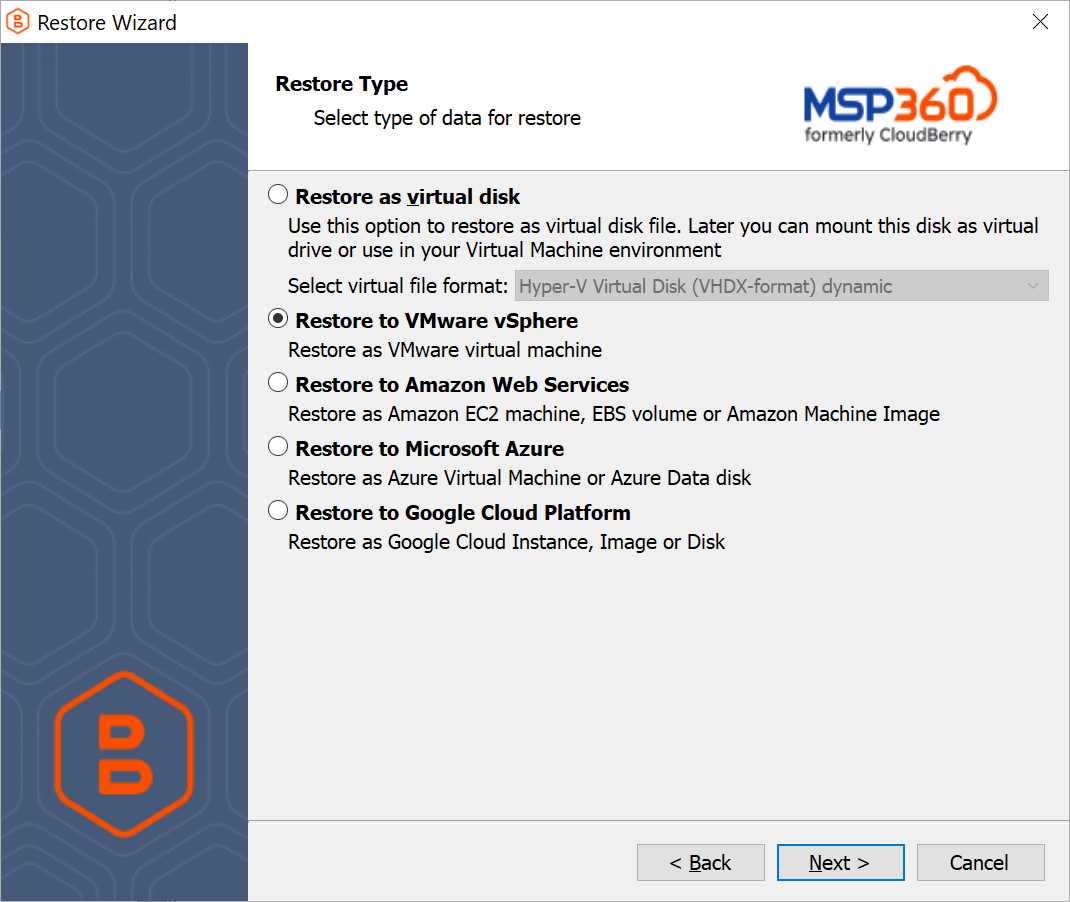
To restore virtual machines to the vSphere, select Restore to VMWare vSphere.
To learn more about other restore destinations, read the Restore to EC2 and Restore to Azure VM chapters
Click Next.
| Top |
Select Virtual Disks
Select virtual disks to restore. You can restore all disks, or select specific disks with Restore selected disks only.
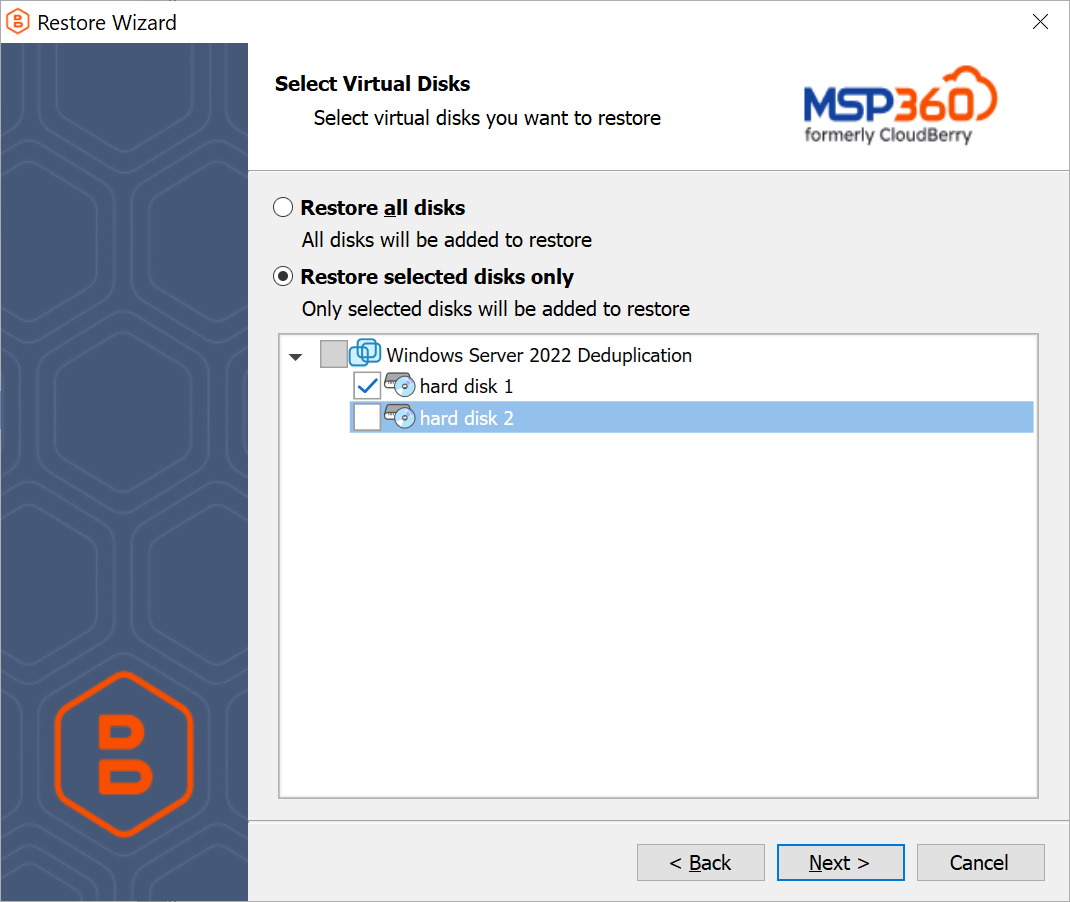
Click Next.
| Top |
Select VMware Host Server
Provide credentials to the target VMware server and select the target host. The host selection is available after you specify the correct credentials to the target VMware server.

Click Next.
| Top |
Restore Options
Select the target datastore to put the restored VMs from the list of available, then configure the restore options.
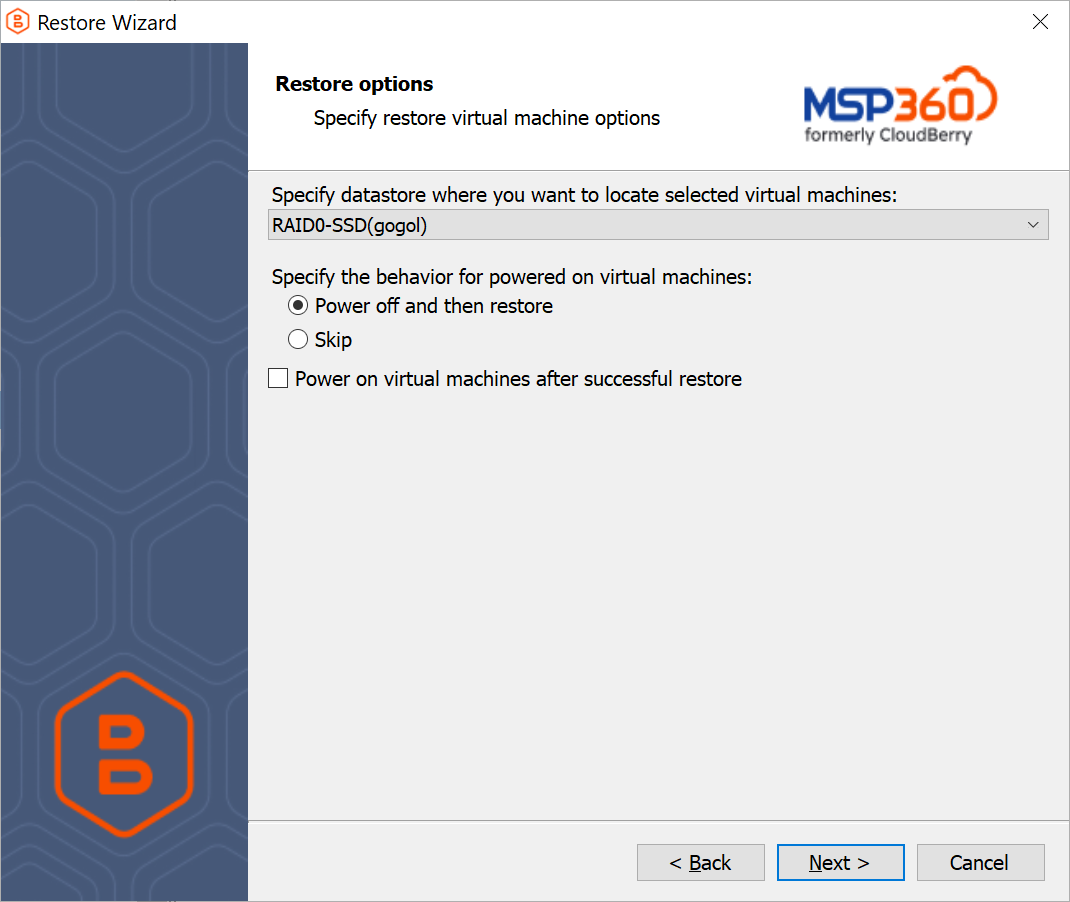
The following restore options are available:
- Configure the action for running virtual machines. You can power the VMs off and then restore or skip the restore if a virtual machine is up and running
- To run the restored virtual machines after the restore plan completes, select the Power on virtual machines after successful restore check box
Click Next.
| Top |
Restore Virtual Machines As
Specify the names for the restored VMs if required.
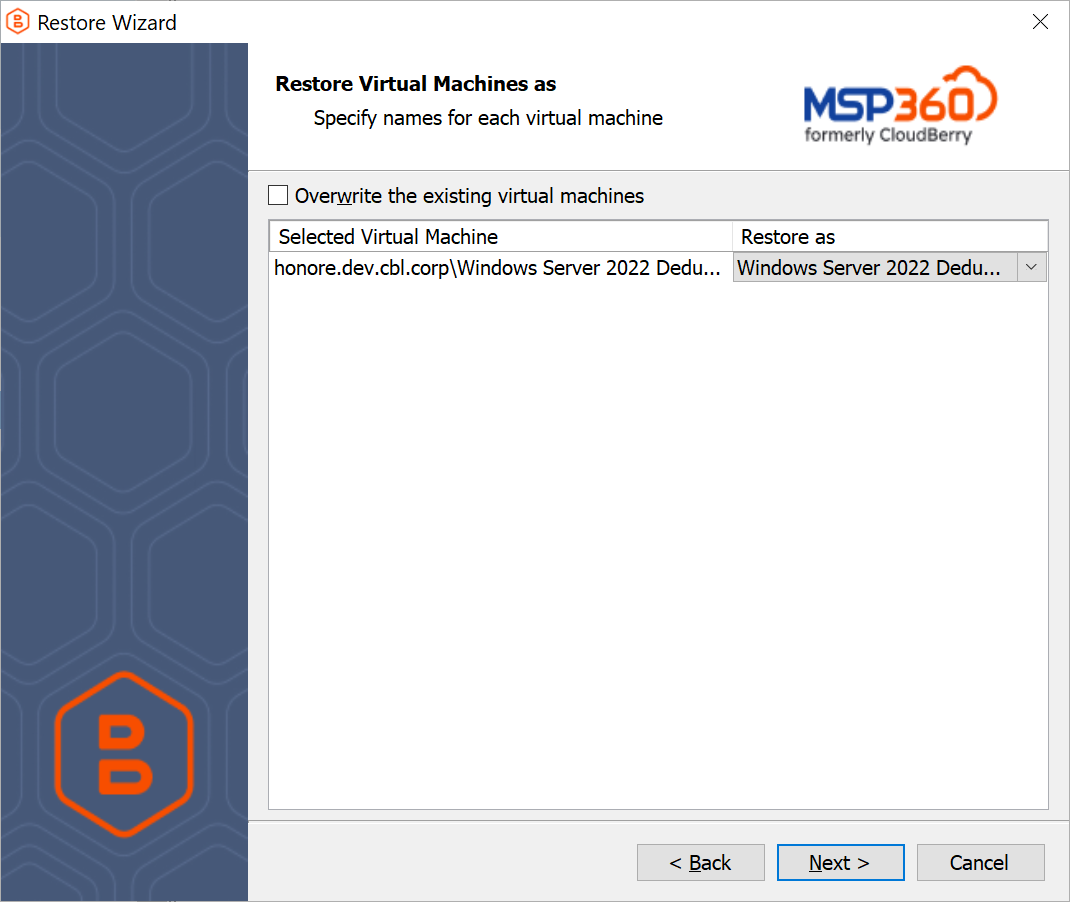
To overwrite the existing virtual machines on the target datastore, select the appropriate check box.
Click Next.
| Top |
Schedule
Specify the restore plan schedule settings if required.
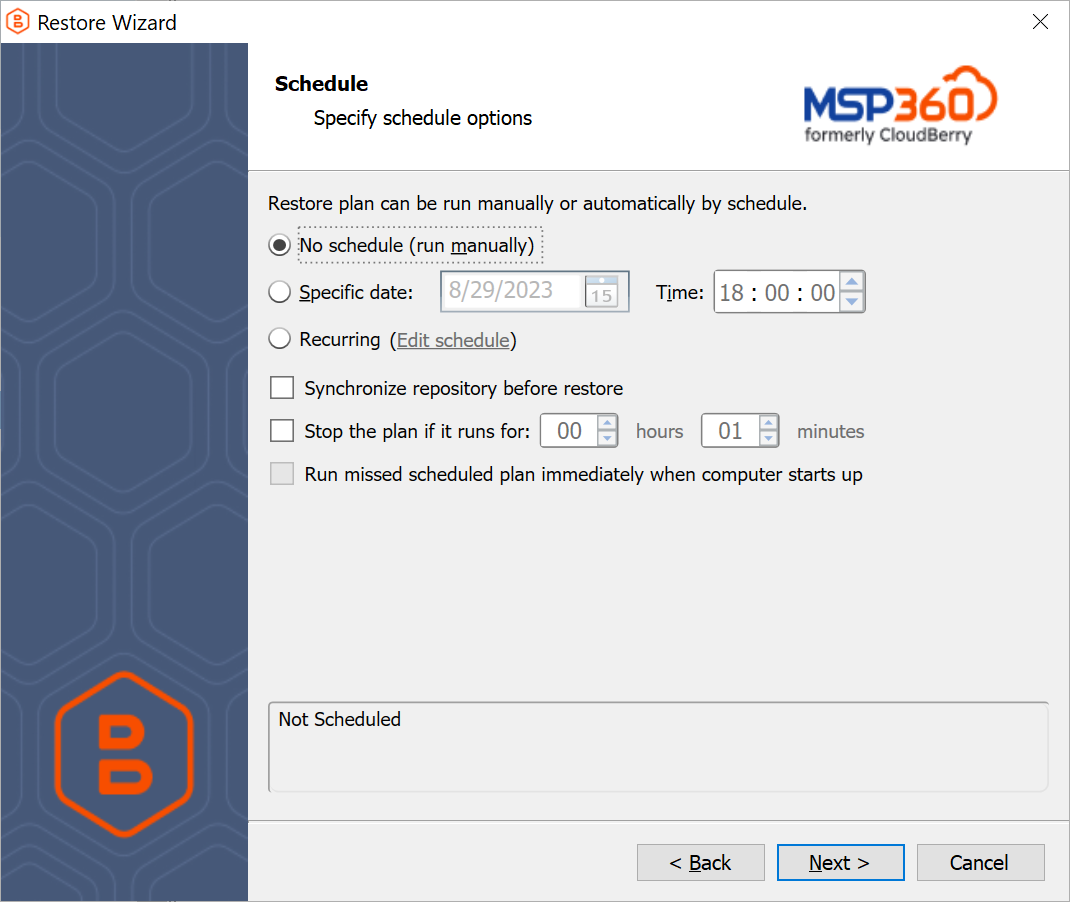
The following options are available:
- If you intend to run the restore plan manually, select the No schedule option
- If you intend the restore plan to run on a particular date and time, select the Specific date option, then specify the required date and time
- If you intend the restore plan to run on a constant periodic basis, select the Recurring option, then customize the schedule
- Select the Synchronize repository before restore check box to run the repository synchronization before restore. Be aware that in some cases with huge data amounts the sync procedure can take up to several hours
- To stop the restore plan in case it continues suspiciously long, select Stop the plan if it runs for check box, then specify the maximum plan duration
- To run the restore plan as the powered-off computer (where this restore plan is created) is on in case the restore plan run was missed by schedule, select the Run missed scheduled plan immediately when computer starts up check box
Click Next.
| Top |
Pre / Post Actions
Customize actions to be taken before and/or after the restore plan execution.

Custom Scripts
You can execute custom scripts before or after running the restore plan.
- To specify the script execution before the restore plan, select the Pre-restore action check box, then specify the path to the script in the field below. To open a standard Windows dialog box, click the ... button
- Select the pre-restore script execution options:
- Do not run the backup plan if the pre-restore action fails. Select this option to cancel the restore plan in case the specified script fails
- Run the restore plan if the pre-restore action fails. Select this option to run the restore plan regardless of the specified script execution results
- To specify the script execution after the restore plan terminates, select the Post-restore action check box, then specify the path to the script in the field below. To open a standard Windows dialog box, click the ... button
- Select the post-backup script execution options:
- Execute post-restore action only if restore plan completes successfully. Select this option to execute the post-restore script only in case of a restore plan success
- Execute post-restore action regardless of the restore plan result. Select this option to execute the post-restore script in any case
Note that an absolute path to a script is required, i.e. if you specify the path to a script, it should be as follows:
c:\scripts\prebackup-script.bat
In case the absolute path to a script file is not specified, the default directory for script is "C:\Windows\System32"
The following script formats are supported: EXE, COM, BAT, CMD, or PIF
Note that Backup for Windows supports EXE files, but they have several restrictions: EXE files must not use a GUI and must close automatically upon termination.
For example, the following script will not succeed:
cmd.exe /F:ON
In this case, this command must be used with the /C parameter, as shown below:
cmd.exe /F:ON /C
The same restriction applies to applications executed by PowerShell scripts:
PowerShell.exe Start-Process cmd.exe exit
Click Next.
| Top |
Notifications And Logging
Specify the notification and logging settings for the plan.
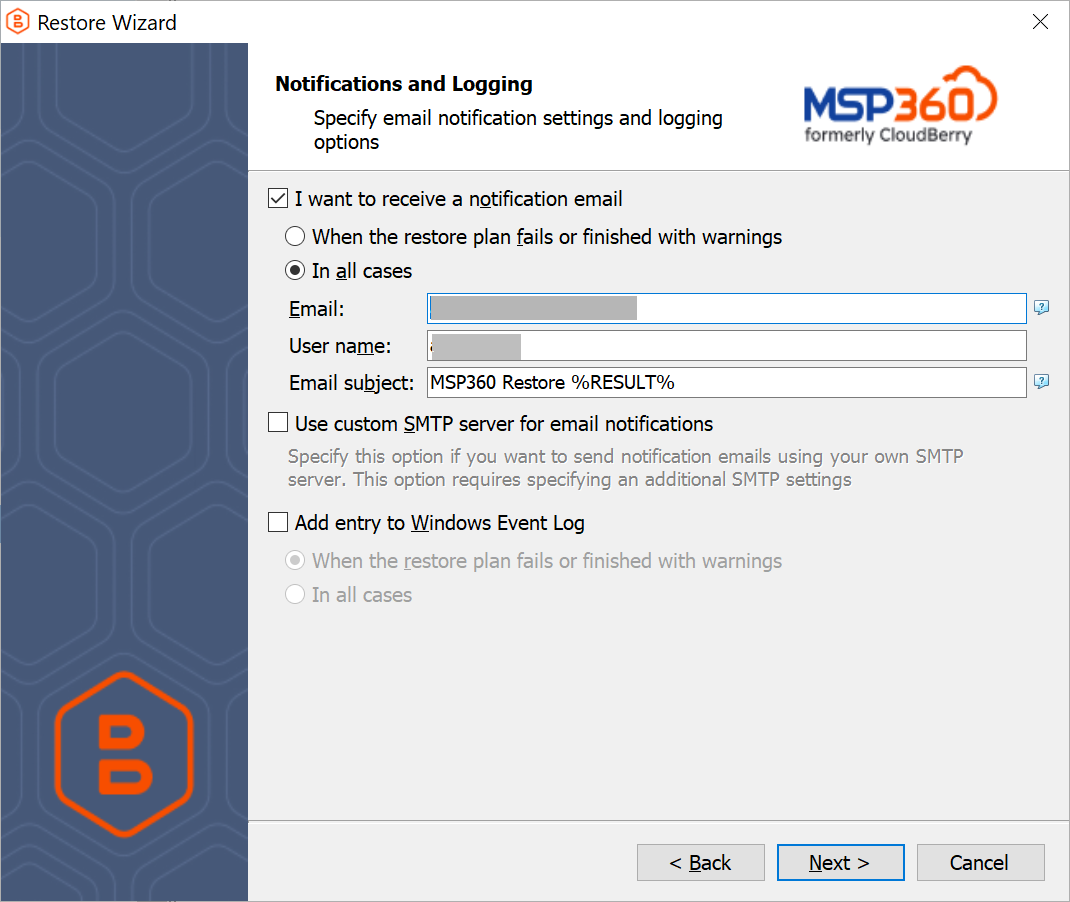
- To receive the notification after the restore plan completion, select I want to receive notification email check box
- Select the When restore plan fails or finished with warnings option if you want to receive the notification message only in case the plan was not finished successfully for some reason
- Select the In all cases option if you want to receive the notification message in any case
- In the fields Username, Email, Email subject specify the notification email details. You can specify one or more email recipients. Separate them by semicolon or comma, the recipient name (one for all of them). The email subject can also contain any of the following variables:
- %COMPUTER_NAME% Indicates the name of a computer on which the plan is executed
- %RESULT% Indicates the plan result
%RESULT% variable has the following values:
- Completed. This value is assigned when the plan is terminated with success
- Completed with warnings. This value is assigned when the plan is terminated with errors, warnings or has been interrupted
- %PLAN_NAME% Indicates the plan name.
- If you want to use own SMTP server for notification emails, select the I want to use my SMTP server for email notifications check box, then specify the settings for the SMTP server
- If you want the restore plan record to be added to Windows Event Log, select the Add entry to Windows Event Log check box
- Select the When restore plan fails or finished with warnings if you want to receive the notification message only in case the plan was not finished successfully for some reason
- Select the In all cases option if you want the entry to be put in Windows Event Log in any case
Click Next.
| Top |
Check Network Shares
Check if the backup service has access to the network shares you specified.
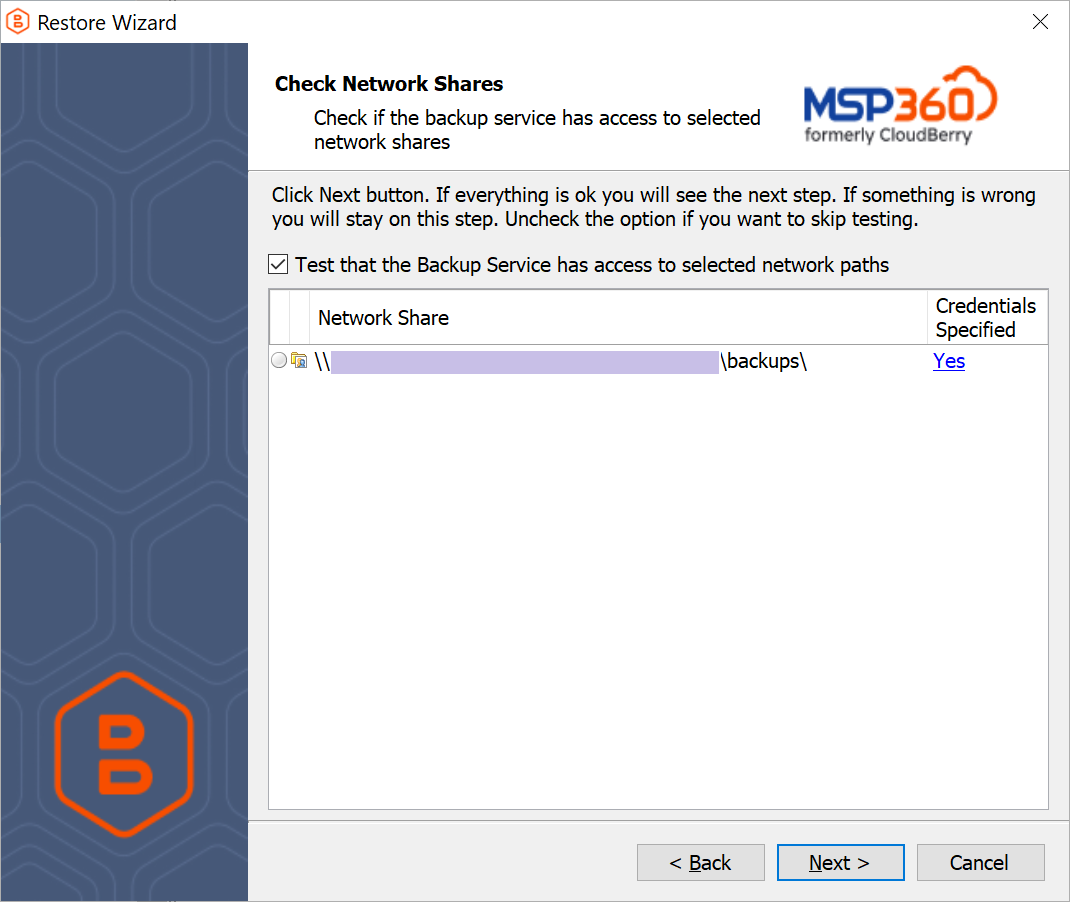
This step is optional.
Click Next.
| Top |
Edit a Restore Plan
To edit the restore plan, proceed as follows:
- Switch to the Restore Plans tab.
- Open the restore plan you want to edit by expanding it, then click Edit.
- Proceed through the Restore Wizard steps to adjust settings as needed.
- If the plan is currently running, you'll need to select one of the following options:
- Apply changes after the restore plan completes
- Stop the plan and apply changes.
- After choosing the desired option for the running restore plan, click Apply.
- Save the edited plan configuration.
You can edit certain scheduled restore plan parameters directly, without using the restore wizard, as long as the restore plan is not currently running. Editable parameters are marked with a pencil icon. To make a quick edit, simply click the pencil icon next to the parameter
Delete a Restore Plan
To delete the restore plan, proceed as follows:
- Switch to the Restore Plans tab.
- Open the plan to delete, expand it, then click Delete.
- Click Yes to confirm the restore plan deletion.