Meetings
The Meetings feature enables you to host a meeting for an unlimited amount of participants and record it.
This chapter covers the following topics:
- Start a Meeting
- Meeting Menu
- Meeting Settings
- Adjusting Sound and Microphone
- Recording Meeting
- Invite Participants to Meeting
Start a New Meeting
To Start a New Meeting
- Run Connect.
- In the application menu, select the Meetings tab.
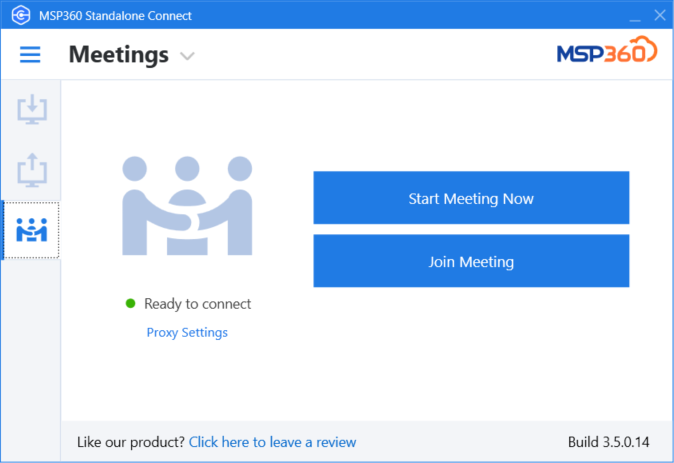
- Click Start Meeting Now.
- Once the meeting session is being initialized, select the sharing option. The following options ara available:
- Share the entire screen. Select this option to share your screen for meeting participants
- Share a specific application. Select this option to share a separate specific application window.
Meeting Menu
Once the meeting session is on, the control panel is displayed on the right. In the control panel, the following features are available:
- Manage participants
- Configure sound and microphone
- Configure shared screen and applications
- Copy the meeting ID
- Use chat access .
Meeting Settings
Adjusting Sound and Microphone
To Adjust Sound To adjust the sound volume, click the loudspeaker icon, then adjust the volume with the slider.
To Switch the Microphone On To switch the microphone on, click the microphone icon. The green icon means the microphone is on, the red one means the microphone is off.
To Select Input and Output Devices All available input and output devices are listed in the Meeting menu. To select the device you want to use for the current meeting, open the Meeting menu.
- To specify the input device, select the Recording device item
- To specify the output device, select the Playback item.
Recording the Meeting
To learn how to record the meeting, refer to the Recording Sessions chapter.
Invite Participants to Meeting
To Invite New Participants Open the Meeting menu, then select Copy Meeting Link item. Send the link to users you want to invite.