File Backup (Legacy Backup Format)
The file backup is the most common backup type and is designed to ensure that your sensitive and important information is regularly backed up and not vulnerable to hardware malfunctions or ransomware attacks. This backup type allows you to back up selected files from your computer to any backup destination (local or cloud storage). The file-level backup is the best for backing up important project files, source code, personal documents, photos, etc.
The file-level backup is configured in the backup wizard. To start it, click Backup on the main toolbar or press CMD+B.

Backup Wizard Shortcuts
- Step 1. Backup Plan: Cloud Storage
- Step 2. Backup Plan: Plan Name
- Step 3. Backup Plan: Backup Source
- Step 4. Backup Plan: Advanced Filter
- Step 5. Backup Plan: Compression and Encryption
- Step 6. Backup Plan: Schedule
- Step 7. Backup Plan: Full Schedule
- Step 8. Backup Plan: Retention Policy
- Step 9. Backup Plan: Pre/Post Actions
- Step 10. Backup Plan: Notification
- Step 11. Backup Plan: Summary
Step 1. Backup Plan: Cloud Storage
Select a backup destination or create a new one.
If no backup destination is specified, click the + icon to create it. To learn more, refer to Adding Backup Storage chapter.
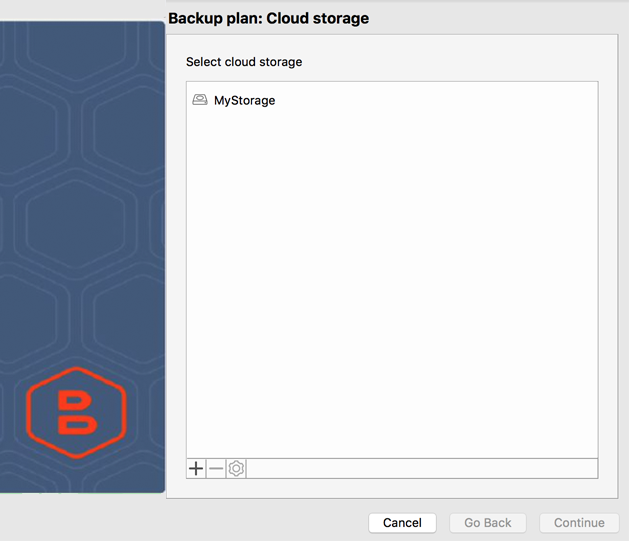
To delete the existing cloud storage account, click the - icon, then confirm the deletion in the dialog box.
To edit the cloud storage account settings, click the gear icon.
- Once you are done with the backup destination, click Continue.
Step 2. Backup Plan: Plan Name
Specify the backup plan name. This name will be displayed throughout the application when referring to the plan.
- To use the block-level backup, select Use block level backup check box
Block-level backup implies uploading only modified parts of your objects during subsequent backups which reduces upload sizes and bandwidth usage.
Without block-level backup, each object is uploaded entirely.
For example, if you add a single entry to a 5 GB database, so the entire database file will be uploaded on the next backup plan execution.
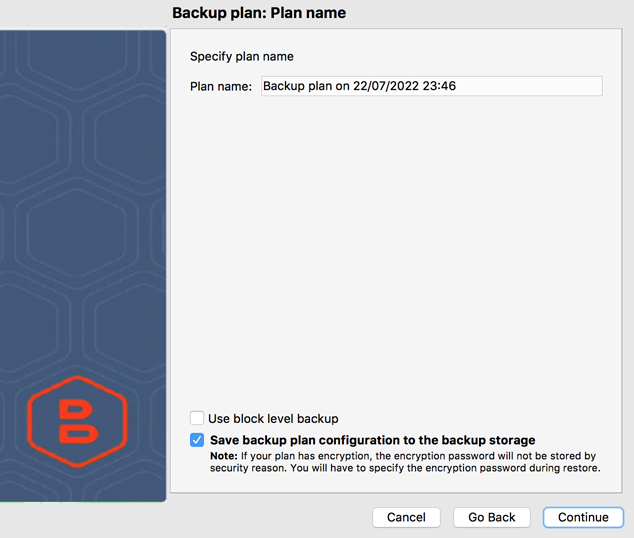
- To save the backup plan configuration for further use (for example, restore backup plan configuration to another computer), select Save backup plan configuration to the backup storage check box
- Once the backup plan name and other settings on this wizard step are specified, click Continue.
Step 3. Backup Plan: Backup Source
Select files and directories to back up.
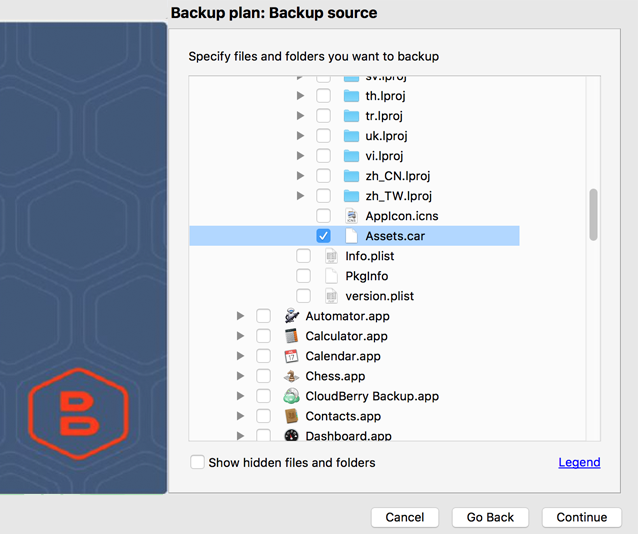
To display hidden files and directories, select the Show hidden files and folders check box
You can configure the symlink backup. Find the symlink backup setting in the Settings menu, on the Backup tab
- Once the files and directories to back up are specified, click Continue.
Step 4. Backup Plan: Advanced Filter
Advanced file filtering allows you to configure file and directory settings that are to be backed up or skipped in the backup plan.

- To back up all files in directories selected on the previous wizard step, select Back up all files in selected folders option
- To specify the file types to be backed up, select the Back up files of these types option, then specify the file type extensions in the entry field to the right, separating them with semicolons
- To exclude the file types from the backup plan, select the Do not back up files of these types option, then specify the file type extensions in the entry field to the right, separating them with semicolons
- To back up empty directories, select the Back up empty folders check box
- To backup system and hidden files clear Do not back up files used by other processes at the moment of the backup plan run check box
- To exclude specific directories from the backup plan, select the Skip folders check box, then specify the folders to be excluded in the entry field to the right, separating them with semicolons
You can use masks while specifying files or directories in entry fields. Use * wildcards for masking, i.e.:
- *abcd
- My*
- *My*
Note that masks in wildcards are case-sensitive
By default, Backup for macOS backs up all files in specified directories
- Once the advanced file filtering is configured, click Continue.
Step 5. Backup Plan: Compression and Encryption
Configure compression and encryption. Backup for macOS supports up to 256-bit military-grade encryption by default.
In Backup for macOS, encryption passwords are not kept anywhere for security purposes. If you lose a password, you lose access to backup data as well
This step also contains specific options for cloud storage.
Thus, if the backup destination is Amazon S3, the range of available options includes the following:
- Server-Side Encryption. Use this option to employ multi-factor encryption provided by Amazon AWS
- S3 Transfer Acceleration. Use this option to accelerate file transfer for an extra fee. Note that the target bucket must have this feature enabled
If the backup destination is Microsoft Azure, select the access tier. Read more about access tiers in the Hot, Cool, and Archive access tiers for blob data chapter at docs.microsoft.com.
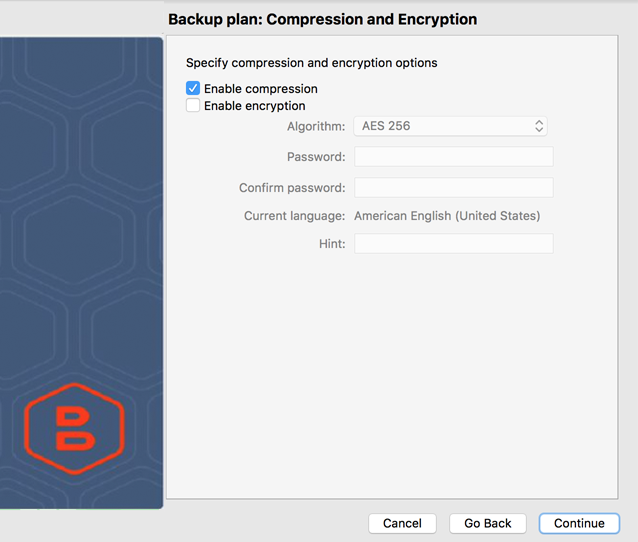
Click Continue.
Step 6. Backup Plan: Schedule
Configure the backup plan schedule. Note that in this step the incremental schedule is configured.
- No schedule. Select this option to run the backup plan manually
- Specific date. Select this option to run the backup plan once, on the specified date and time
- Recurring. Select this option to configure the backup plan execution on a regular basis
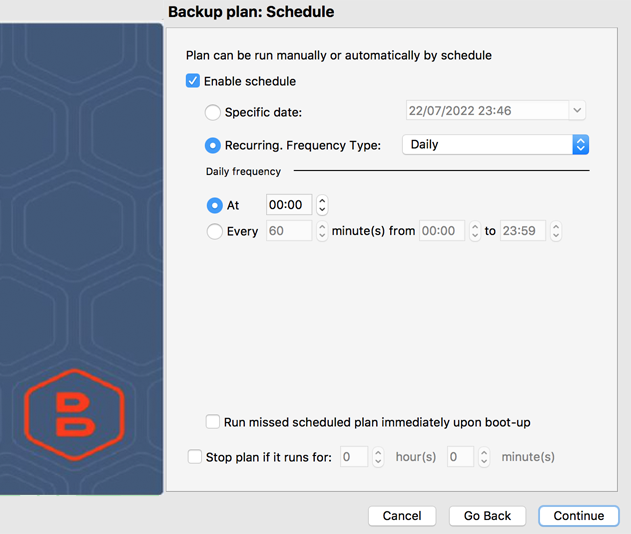
Step 7. Backup Plan: Full Schedule
Schedule full backups. It is recommended to schedule monthly full backups for backup plans with daily incremental backups.
If a backup plan runs longer than expected, it can be stopped automatically. To configure this setting, select the Stop plan if it runs for checkbox and specify the maximum backup plan duration period.
Click Continue.
Step 8. Backup Plan: Retention Policy
Configure the retention policy for the backup plan.
Backup can be explicitly instructed to retain a certain number of versions of each file in the backup storage for a specified period.
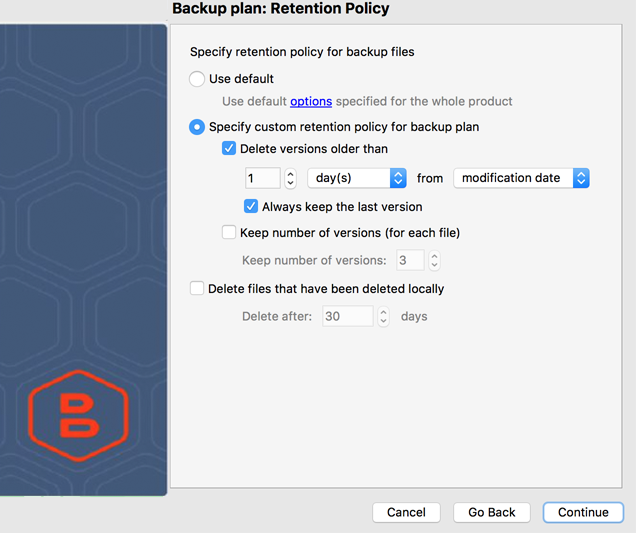
Select the default or custom retention policy for the backup plan. If a custom retention policy is selected, configure it below.
Setting the Delete after text field to 0 will remove locally deleted data from the cloud during the next backup plan execution.
Click Continue.
Step 9. Backup Plan: Pre / Post Actions
This wizard step is available only in the Ultimate edition
Specify pre- and post-backup actions.
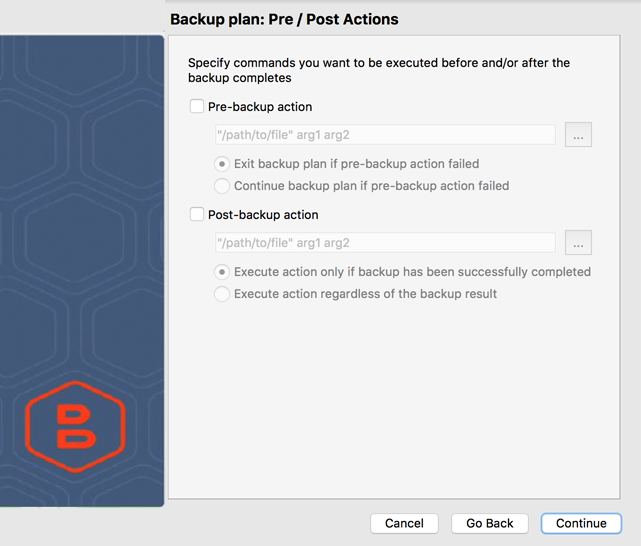
- To specify the pre-backup action, select the Pre-backup action check box, then specify the path to the pre-backup script.
Note: the path to the script must be in quotation marks
* Select **Exit backup plan if pre-backup action failed** option if you do not want the backup to be launched if the pre-backup action fails
* Select **Continue backup plan if pre-backup action failed** option if you want the backup to be launched regardless of the pre-backup action result
- To specify the post-backup action, select the Post-backup action check box, then specify the path to the post-backup script.
Note: the path to the script must be in quotation marks
* Select **Execute action only if backup has been successfully completed** option if you want the post-action to be launched only after the successful backup completion.
* Select **Execute action regardless of the backup result** option if you want the post-action to be launched regardless of the backup completion results.
Click Continue.
Step 10. Backup Plan: Notification
Specify the email notifications setting on backup plan results. If the plan completes or fails, you will receive an email that contains the information regarding the plan status.
Specify your email, user name, and email subject. The email subject can contain the following macros:
- %COMPUTER_NAME%
- %RESULT%
- %PLAN_NAME%
For example, you could enter the following subject:
Backup Plan: %PLAN_NAME% executed with status: %RESULT%
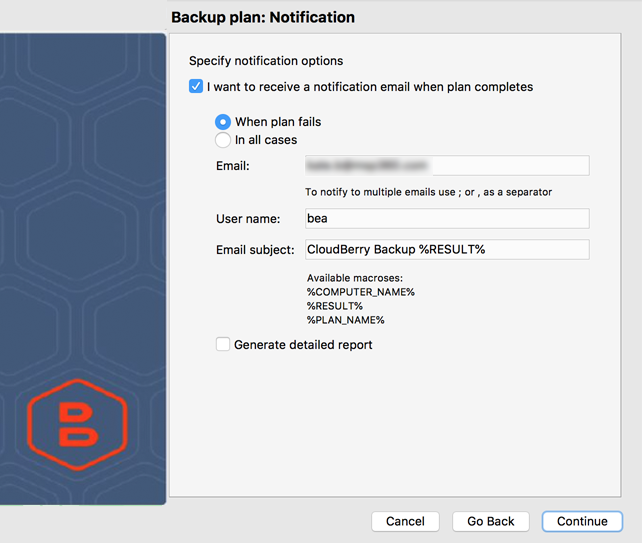
Click Continue.
Step 10. Backup Plan: Summary
Review the backup plan settings on the Summary step, then finish the backup plan.
Run Backup Plan
To run the backup plan, click run button on the main toolbar. In the meantime, you can observe the backup process in the progress bar at the bottom of the plan view.
As the backup plan is completed, you will be notified according to the notification settings you configured to Backup Plan: Notification step.