Platform: WindowsProducts: MSP360 Backup
Article ID: s0027Last Modified: 06-Oct-2026
Add Backblaze B2 Storage
To add a new Backblaze B2 storage destination, proceed as follows:
- Open the application menu, then click Add New Account.
- Select Backblaze B2 or Backblaze B2 (S3-compatible).
Buckets created prior to May 4, 2020, are not S3-compatible. All buckets created after May 4, 2020, are S3-compatible.
Synthetic backup is supported for S3-compatible buckets only.
- In the Backblaze B2 Account property box, specify:
- In the Display name field, specify the cloud storage name that will be used further.
- In the Account ID/Application Key ID field, specify the KeyID for your Backblaze B2 account.
- In the Application Key field, specify the applicationKey value that has been generated while creating an application key pair.
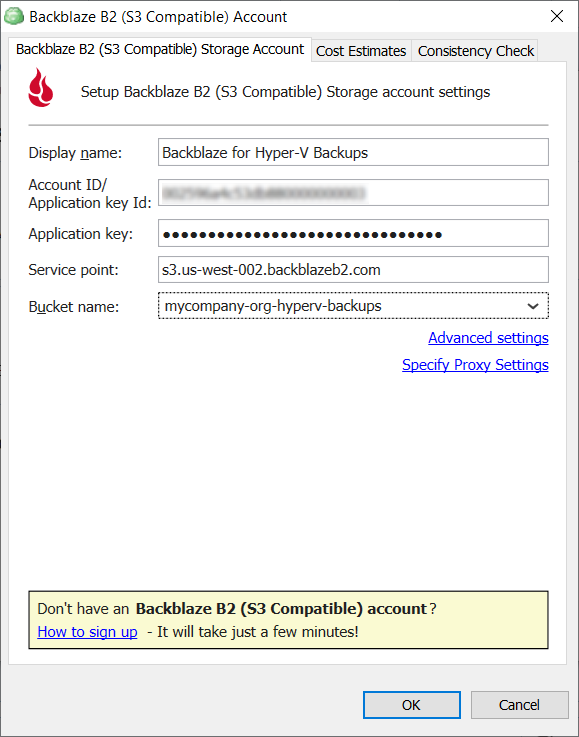
Note that if you are using a master application key, the bucket you access will not be S3-compatible.
To learn more about application key pairs, refer to the Sign Up for Backblaze B2 chapter.
- Specify the bucket for your backups. To do this, select the required bucket in the Bucket name drop-down list.
- Once you have finished specifying the account details, click OK.