Platform: macOSProducts: Connect
Article ID: s0654Last Modified: 15-Oct-2024
In-Session Options
Once the session is established, a in-session menu appears on the top of the host screen:
Windows

MacOS

This control allows you to perform the following actions:
- Show always on top
- Access in-session menu
- Start a chat
- Change a display mode for multiple monitors (optional)
- Mute/unmute the sound
- Mute/unmute the microphone
- Minimize/maximize the screen
- Manage outgoing connections
- Switch between View Only/Full Control mode
- Exit the session
File Transfer feature is currently not supported by Connect for MacOS clients.
Multi-Screen Support
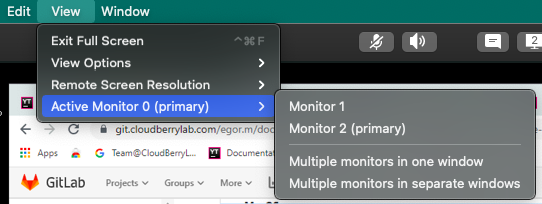
During the session, you can select the display mode for multiple monitors on a remote side. Select required monitor via the topmost View menu.

Or

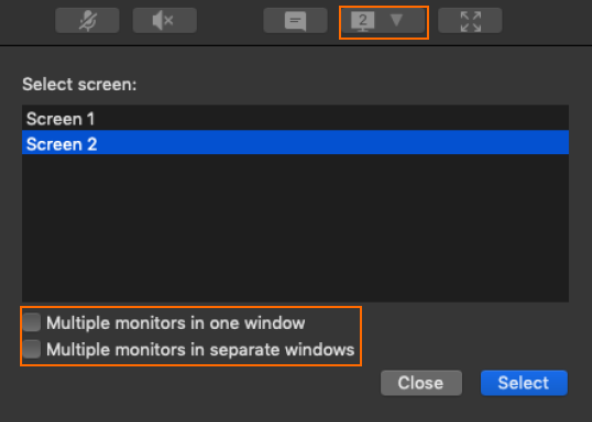
Click Monitor Configuration icon while the session is active, so you can select:
- Switch to a particular monitor. Displays contents of the selected monitor
- Multiple monitors in one window. Displays all monitor content in one window combining the view
- Multiple monitors in separate windows. Displays each monitor's contents in a separate window. You can switch between these windows
View Menu
There is also a number of available features via the topmost View menu. By clicking this menu you can access the following settings:

View Options
- Enter full screen or Exit Full Screen
- View Options > Show Remote Cursor. Displays the remote machine cursor
- View Options > Hide Desktop Wallpaper. Hides the desktop wallpaper, which may affect the speed of connection
- View Options > Disable Aero Style. Disables the Windows Aero style, which may affect the speed of connection
- Remote Screen Resolution*. Changes the remote display screen resolution. Use this option if you want to speed up the connection. As of Connect 3.3 on both sides and Unattended Access turned on, if you change the resolution, you will be prompted to save this setting. This setting can be saved for each of multiple monitors separately.