User Scenario
This section describes the typical workflow for using Connect Quick Support during a remote assistance session.
Step 1. Launch Connect Quick Support
Run the downloaded .exe file to start Connect Quick Support. When launched, Windows will prompt you to allow the application to make changes to your device:
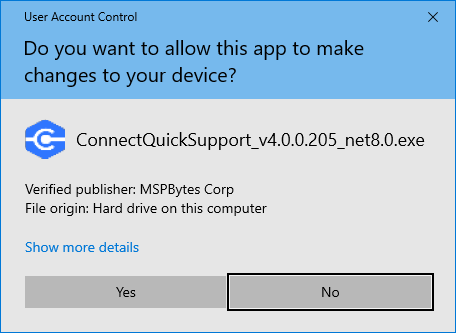
If you select Yes and your account has administrative privileges: The application starts in full mode (recommended).
If you select Yes but your account does not have administrative privileges: The application starts in limited mode. Support engineers will have the same access level as your user account.
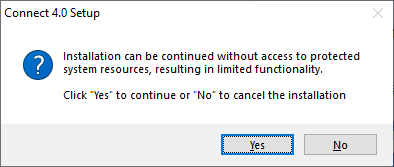
If you select No: The application starts in limited mode, and support engineers will not have access to protected system resources.
In some environments, you may be prompted to enter administrative credentials to confirm your choice.
Step 2 (optional). Configure Proxy Settings
If your environment uses a proxy server, configure the proxy settings as described in the related article.
Step 3. Share Access Data
Share your Computer ID and PIN with the support engineer assisting you.

To copy these values to the clipboard, click the corresponding field.
Once the support engineer joins the session, follow their instructions to proceed with troubleshooting.
Step 4. Quit Connect Quick Support to Remove the Application
When the issue is resolved, simply close the application window. Connect Quick Support will automatically remove itself from your device.
The Connect Quick Support .exe file cannot be removed automatically. You can delete this file manually or keep it for future use if needed.