Configure Proxy Settings
For users with a network configured using a proxy server or proxy software, the Proxy tab allows you to configure these settings for CloudBerry Drive.
To configure your proxy options, click on the CloudBerry Drive icon in the system tray, and select Options from the main menu.
- On the Options window, click the Proxy tab.
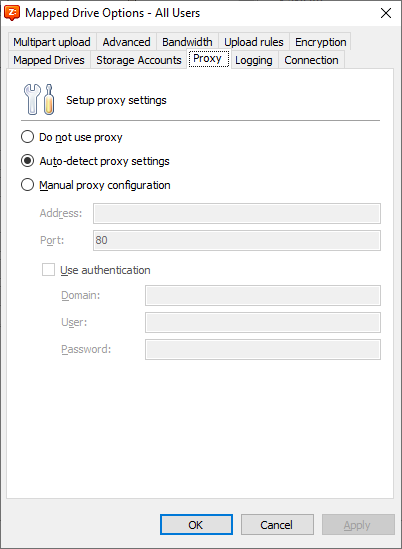
Users can select one of three options in the Setup Proxy Settings section.
Do Not Use Proxy. Proxy settings will not be configured (default).
Auto-Detect Proxy Settings. Proxy settings for your server are detected and configured automatically.
Manual Proxy Configuration. Allows the user to manually enter their proxy settings. The remaining fields are made active if this option is selected.
If you selected Auto-Detect Proxy Settings option, click Apply or OK. If you selected Manual Proxy Configuration option, provide the following information as described in Manual Proxy Configuration below:
Manual Proxy Configuration
Provide the following information
In the Address field, enter the address of the proxy server.
In the Port field, enter the number of the port being used by the server.
Select the Use Authentication checkbox if this server requires authentication when connecting. Selecting this check box will activate the Domain, User, and Password fields.
Enter the Domain, User, and Password used to log in to the proxy server.
Click Apply to save your changes.
Click OK to exit.