Configure Cache Settings
When uploading files to cloud storage, CloudBerry Drive uses a cache directory as a temporary file location before uploading to the cloud.
To configure cache settings, click the CloudBerry Drive icon, and select Options from the main menu.
- On the Options window, click the Advanced tab.
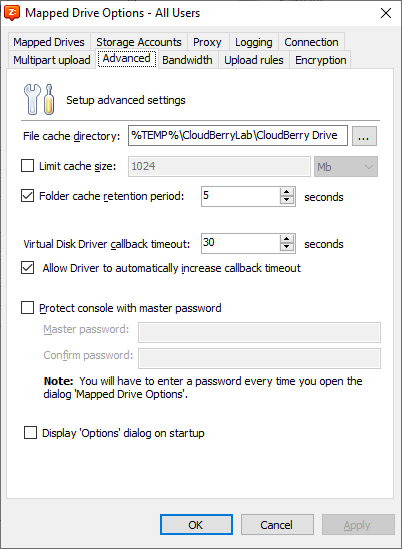
Select the path to the file cache directory. By default, it is CloudBerryLab\Drive directory in the temporary folder in Windows:
%TEMP%\CloudBerryLab\Drive. You can set any folder for that purpose on the Advanced tab in the Options.Provide Folder cache retention period. This option is the cache retention period for folders. This interval controls how often Explorer refreshes. For example, if someone uploads a file to a cloud from another computer, the Drive will not be able to see this change in listing until retention period expires (even if you click the "Refresh" button in Windows Explorer). You should click "Refresh" and wait for this time period; the next "Refresh" will reload folder contents from the cloud. By default, it is 5 seconds.
Click Apply to save your changes.
Click OK to exit.