Continue Backups On Another Computer
In some cases, you may need to continue backups on different computers. This can be done with Backup for Windows. To continue backups on another computer, proceed as follows:
- Download and install an instance of Backup for Windows on another computer.
- Add the same storage account used on the original computer.
- Set the same backup prefix used on the original computer.
- Synchronize the repository.
- Restore backup plans.
- Continue backups.
Download and Install MSP360 Backup
If MSP360 Backup is already installed on the target computer, you can skip this step.
To continue backups on a new computer, download and install a new instance of Backup Agent on another computer.
You can start with a 15-day free trial.
It is recommended to use the same email for registration that you use on the original computer
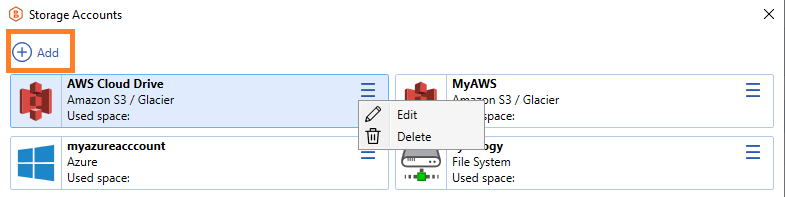
Add the Storage Account
Add the storage account that was used on the original computer to the target computer if it is not already added..
- In the application menu, select Edit Storage Accounts, then click + Add
Refer to the Backup Destinations section for details.
Set Backup Prefix
This is the most important step of the procedure. You should set the same backup prefix on the storage account that was used on the original computer. To set the original backup prefix, proceed as follows:
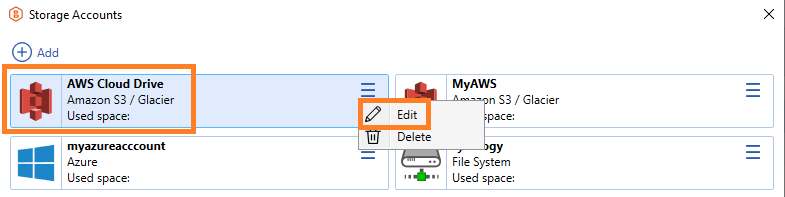
- In the application menu, select Edit Storage Accounts.
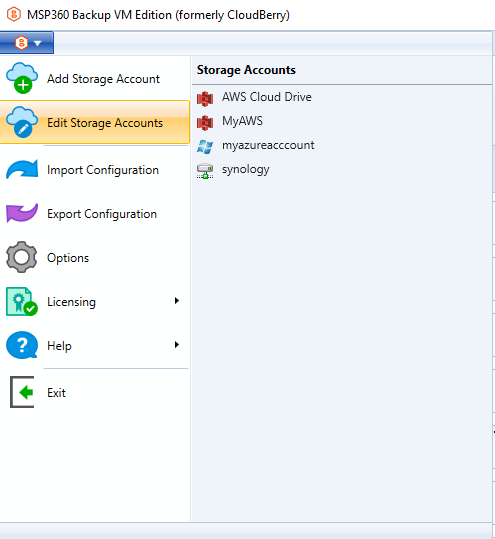
- Select the necessary storage account, expand actions, and click Edit Account.
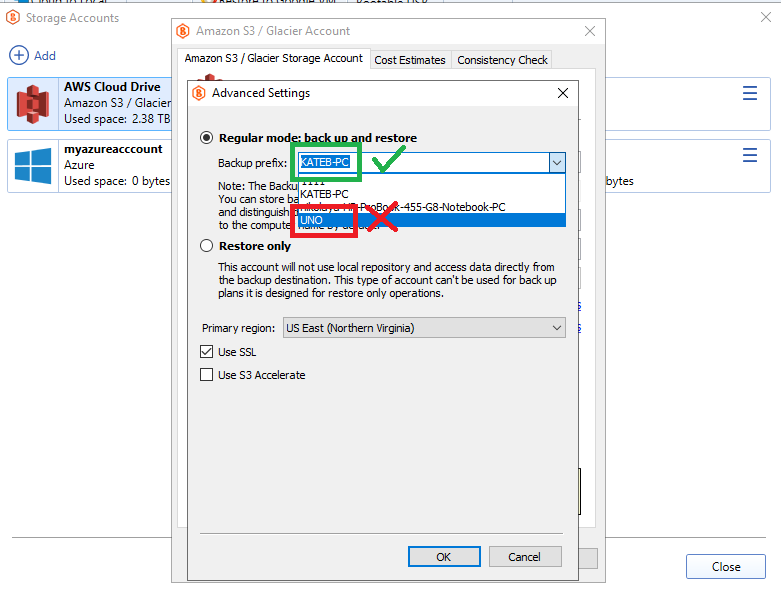
- On the Storage Account tab, click Advanced Settings.
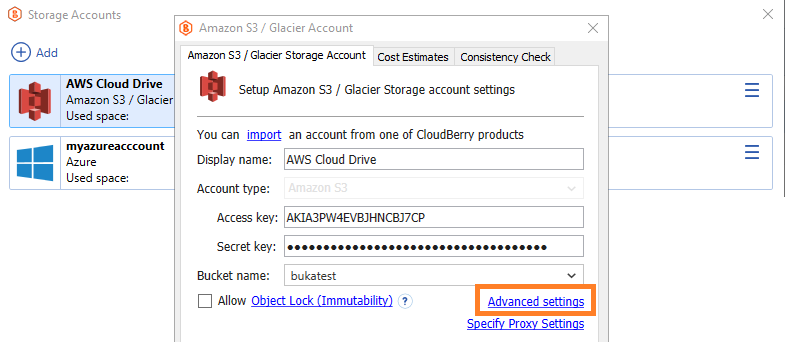
- To continue backups, select Regular mode: back up and restore. This mode is used for both operations: backup and restore ones. In this mode, change the backup prefix to the one that was used on the original computer.
- A backup prefix acts as a directory within the storage account that contains the backups for a specific computer. For example, if the original computer was named KateB-PC and had the backup prefix KATEB-PC on the storage account AWS Cloud drive, and you are now planning to continue backups on a new computer named Uno (with a default prefix of UNO on the storage account AWS Cloud drive), you must change the prefix UNO to KATEB-PC on the target computer Uno:
To learn more about using backup prefixes, refer to the Backup Prefix Explained chapter
Synchronize the Repository
To retrieve the info about backup contents in backup storage in case this operation is not started automatically after the backup prefix has been changed, synchronize the repository. Proceed as follows:
- In the horizontal bar, select Tools.
- Select Options.
- Switch to the Repository tab.
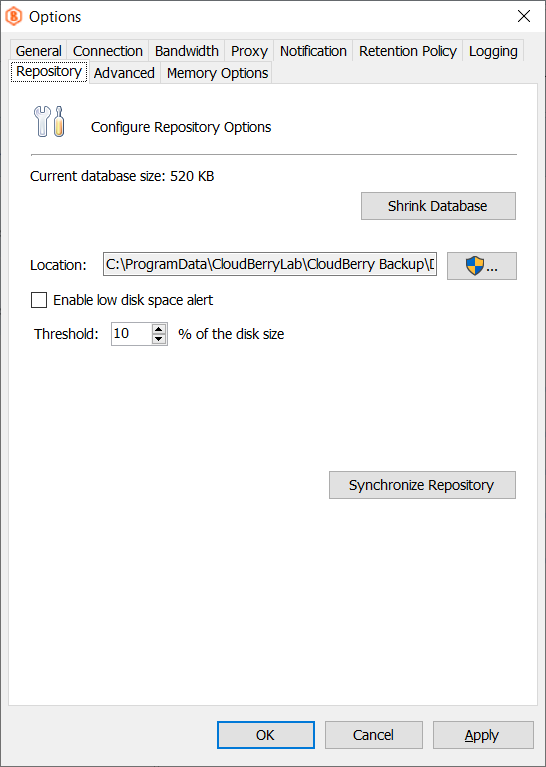
- Click Synchronize Repository.
- Select the storage account that was used on the original computer, then click Synchronize Now.
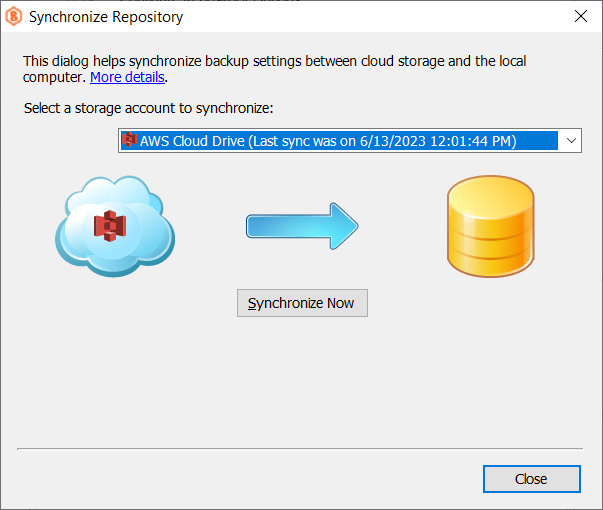
In case you do not see your backup data, check the storage account settings; you may have selected an incorrect backup prefix
Restore Backup Plans
If backup data is available on the Backup Storage tab, restore backup plans created on the original computer to continue on another computer.
The following cases are possible:
- Backup plans in the new backup format
- Backup plans in the legacy backup format with configuration saved to backup storage
- Backup plans in the legacy backup format saved only locally on the original computer
If the original computer is still available, you can export the entire configuration -(backup template) to apply (import) this configuration- (backup template) to a new MSP360 (CloudBerry) Backup instance as described in Importing/Exporting the Configuration. This configuration includes all settings and backup plans from the original computer.
Restore Backup Plan In The New Backup Format
- On the Backup Storage tab, point to the backup plan (new backup format) you want to continue on this computer.
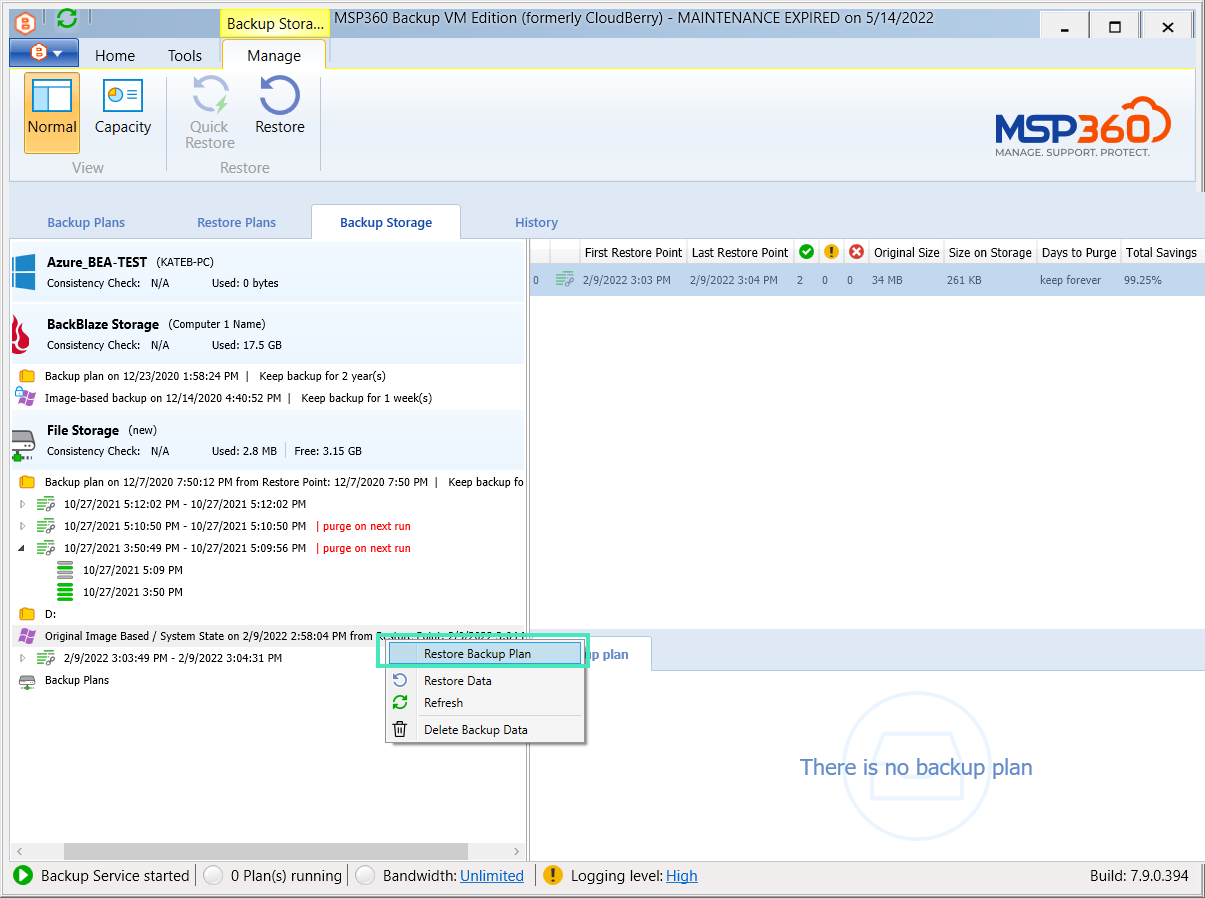
- Right-click the plan, then select Restore Backup Plan.
- Repeat this operation to restore all required backup plans in the new backup format.
For the image-based backup plans with the Back up selected partitions only option selected, these plans need to be edited to manually select the partitions again: partition GUIDs are different on another computer
Restore Backup Plan In The Legacy Backup Format With Configuration Saved In Backup Storage
- On the Backup Storage tab, click the Backup Plans, then in the right pane select the plan you want to continue on this computer.
- Click Restore Data.
- In the Restore Backup Plan dialog, select the Restore selected backup plan option.
- Repeat this operation to restore all required backup plans.
To continue backup plans in the legacy backup format with configuration not saved in backup storage, create new backup plans manually.
Continue Backups
Once required backup plans are restored, the backups will continue on the target computer. Release license on the original computer or using CloudBerry Central if the original computer is no longer available to activate it on the new computer.
If the original computer is not available for some reason (hardware crash or whatever), contact the technical support team for assistance.