AWS Snowball Edge
What is AWS Snowball Edge?
AWS Snowball Edge is a 100-TB data transfer solution that accelerates moving large volumes of data into and out of AWS using storage appliances designed to be secure for physical transport.
You order the Snowball Edge appliance from Amazon and they ship it directly to you. Data transfer is performed by MSP360 (CloudBerry) Backup with a backup plan that uses Snowball as the storage target.
Your computer must be suitable for handling this data transportation task in terms of processing, memory, and networking load. See Workstation Specifications to learn about the workstation requirements.
The following sections explain how to move data from your computer to Amazon S3 using MSP360 (CloudBerry) Backup and AWS Snowball Edge.
1. Ordering AWS Snowball Edge
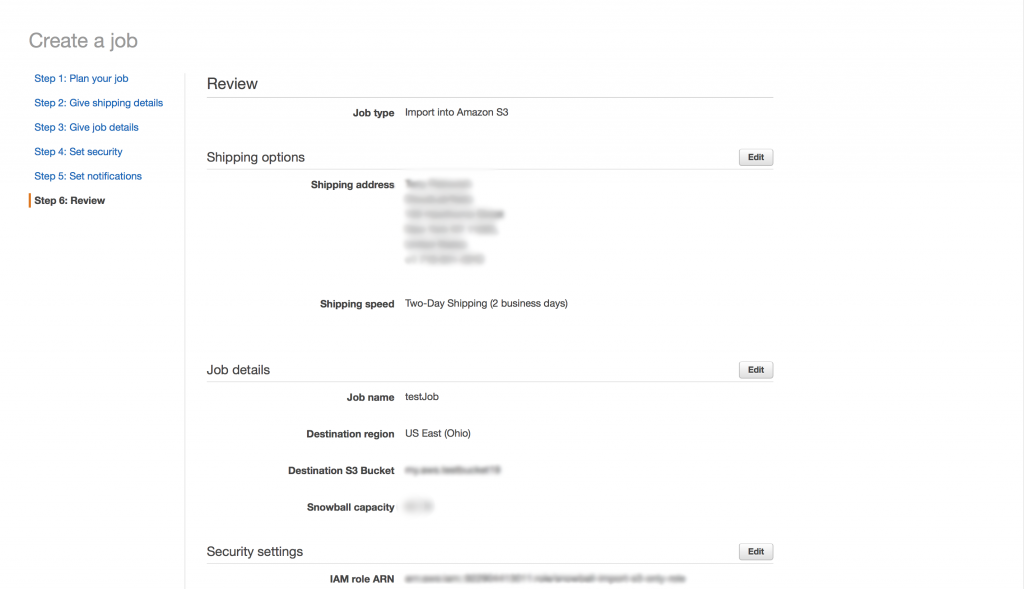
Go to Amazon Web Services, select your region, and create a new import or export job.

Next, specify your address and select the preferred shipping speed.

Specify the job details, such as the job name, the required storage capacity (100 TB), and the required buckets. These buckets will be listed in MSP360 (CloudBerry) Backup when adding Snowball as S3-compatible storage. Click Next to continue.
Configure the security parameters.

Configure the notification preferences.

Examine the order information on the review page and click Create Job.

After receiving the device from Amazon, you can start transferring your data to the Snowball.
2. Back Up Data to Snowball Edge Using MSP360 (CloudBerry) Backup
Configure AWS Snowball Edge
When you receive the Snowball Edge, plug it into power. Each Snowball has been engineered to support data transfer over RJ-45, SFP+ copper, or SFP+ optical 10 gigabit Ethernet. Choose a networking option, and plug the Snowball into your network. Power on the Snowball by pressing the power button above the E Ink display. After turning it on, the box's E-ink screen displays the following information:
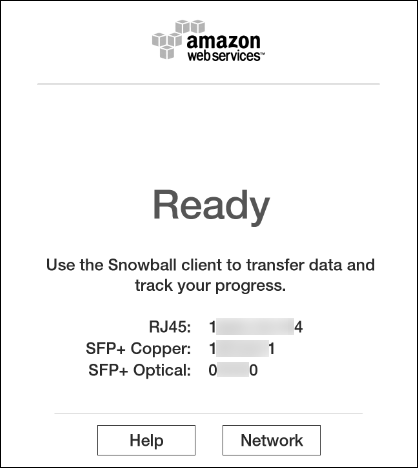
The Snowball Edge automatically fetches the IP address. Click Network to see it displayed. You can customize network settings if required.
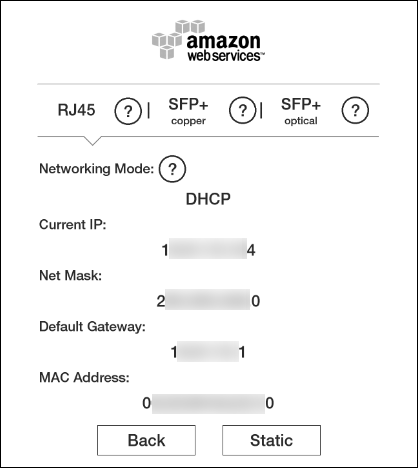
Next, download and install the Snowball Edge Client. You'll need it to generate the local credentials that need to be specified in the MBS Windows Client. Once installed, open the command prompt and execute the following three commands:
snowballEdge configure. This will configure the Snowball Edge.
snowballEdge unlock-device. This will unlock the device.
snowballEdge list-access-keys.
As an output for the last command, you'll get the secret and access keys. Write them down somewhere — you'll need them later.
Now that you have the Snowball's local IP address and the secret and access keys, proceed to add it as you S3-compatible storage in the MBS Web Console.
Create Backup Plan for Snowball Edge
Before creating a new backup plan, create a new S3-compatible account. To do this, proceed as follows:
- In the application menu, select Add Storage Account.
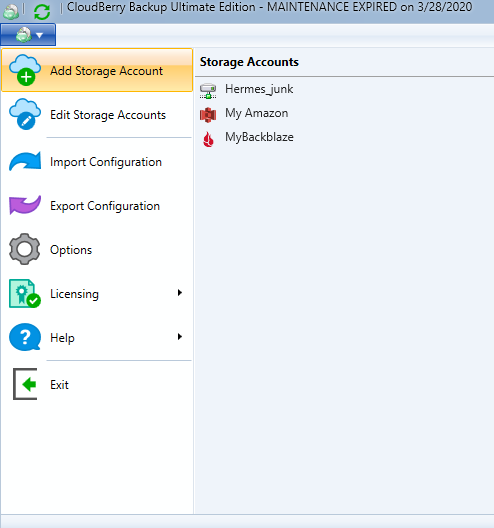
- Select S3 compatible.
- Specify the Snowball Edge credentials.
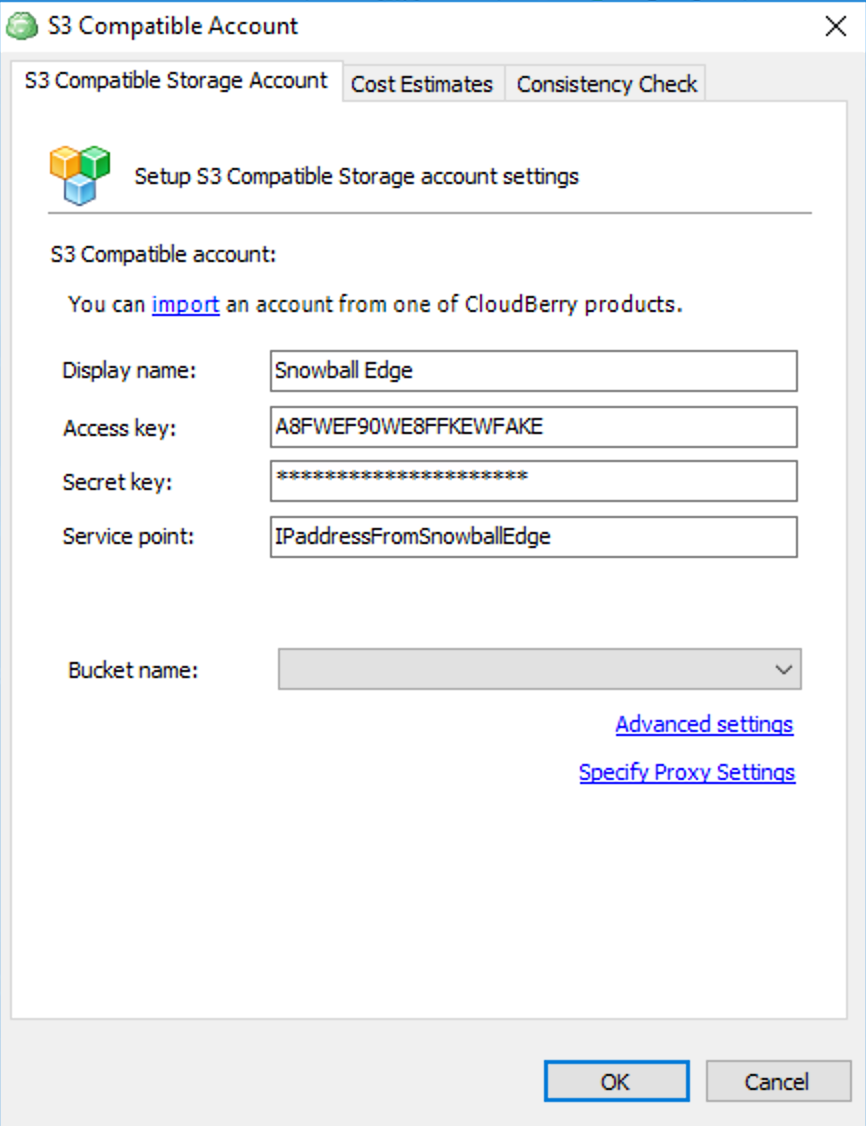
Note when you use the Amazon S3 Adapter for Snowball Edge, every interaction is signed with the AWS Signature Version 4 algorithm by default. This authorization is used only to verify the data traveling from its source to the adapter. Make sure to check that signature version 4 is selected for the storage account. To do this, click Advanced Settings.
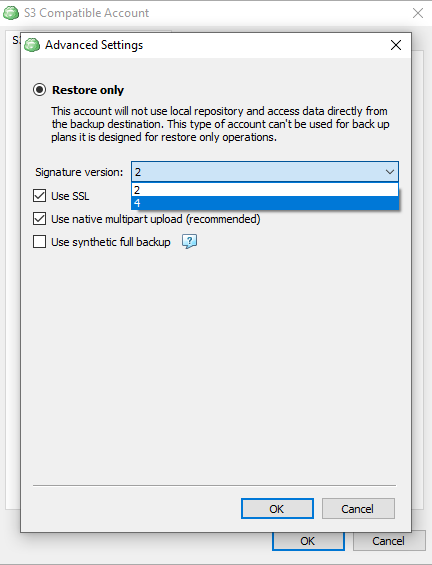
In case the signature version is 2, select 4, then click OK.
- Click OK.
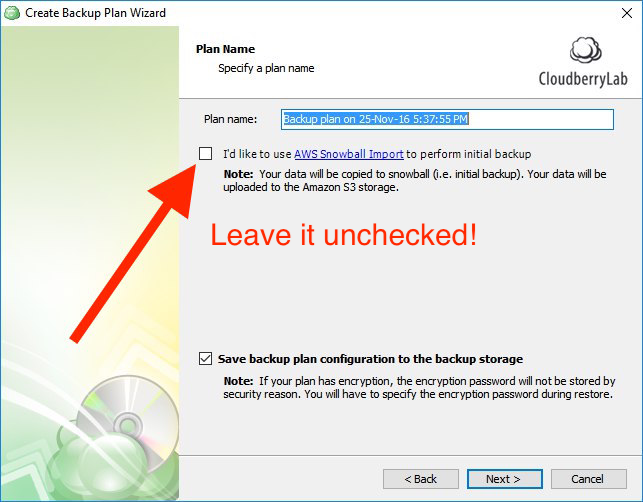
Proceed to create a new backup plan. Do not select the "I’d like to use the AWS Snowball feature to make initial backup" check box when specifying the plan name. This feature is intended exclusively for the regular AWS Snowball.
Ensure that you do not have any other services running on the port 8080 (you can check this using the netstat command).
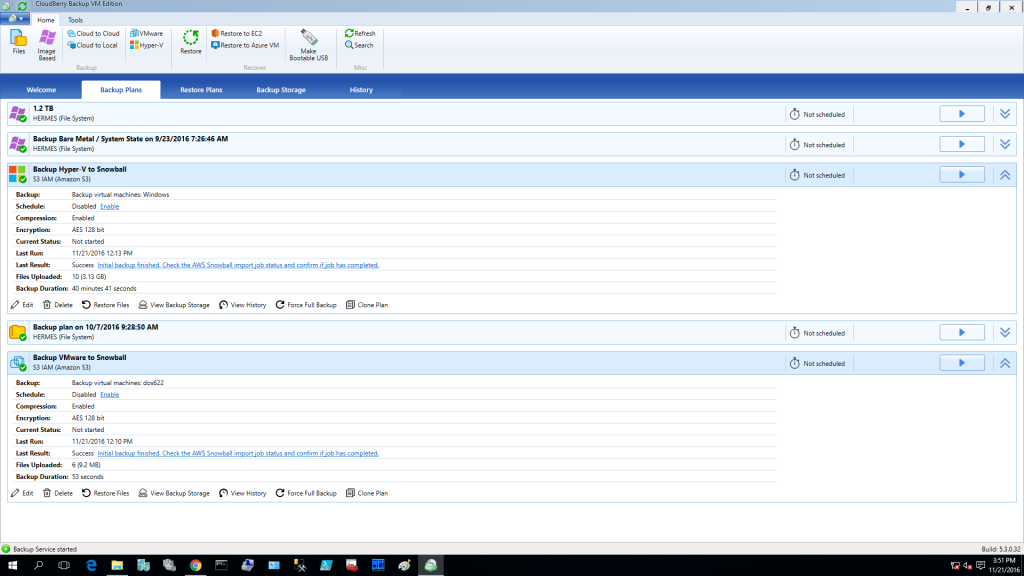
Conclude configuring the backup plan. Run the plan and wait for it to complete.
3. Ship Snowball Edge Back to Amazon
Once the backup plan execution completes, ship the Snowball Edge back to Amazon. Wait for them to process the data and proceed to the next step.
4. Synchronize Repository
After receiving a notification that your data has been moved to your S3 bucket, go back to MSP360 (CloudBerry) Backup and change the backup storage from the S3-compatible AWS Snowball Edge back to your regular Amazon S3 storage.
At this point, MSP360 (CloudBerry) Backup does not recognize what files are in the cloud because the app tracks uploaded files with a local database called repository. This database only contains records about the files that had been uploaded to Amazon S3 with a regular backup plan. Information about the files uploaded using AWS Snowball edge is not in the repository yet and can be retrieved from the cloud by performing a repository sync.
Once the repository is synced, the initial backup with the help of AWS Snowball can be considered complete. All future backups will be performed as usual from your computer to the cloud by means of MSP360 (CloudBerry) Backup.