Sign Up for Google Cloud
To Sign Up for Google Cloud
- Open https://cloud.google.com/, then click Get started for free.
- Select the country of residence, read and select the Terms of Service check box. Select Email updates check box in case you want to get them, then click Continue.
- Fill in the registration form, provide payment details, then click Start free trial.
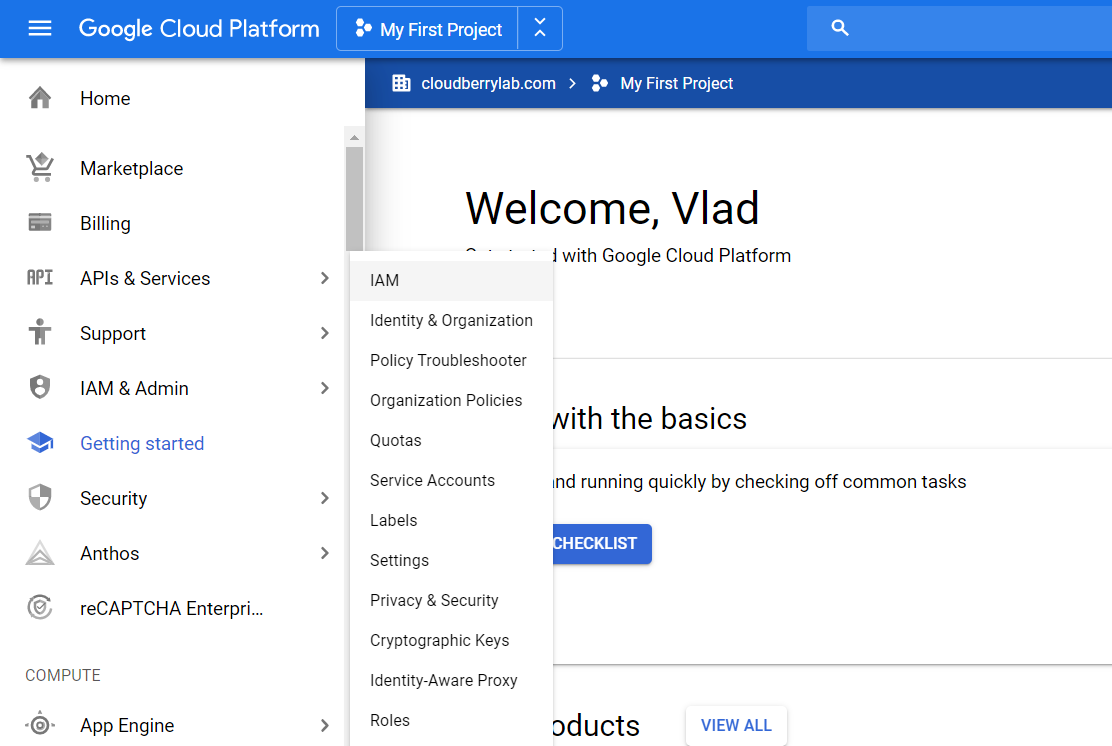
- In the console, . Open IAM & admin menu, then select IAM.
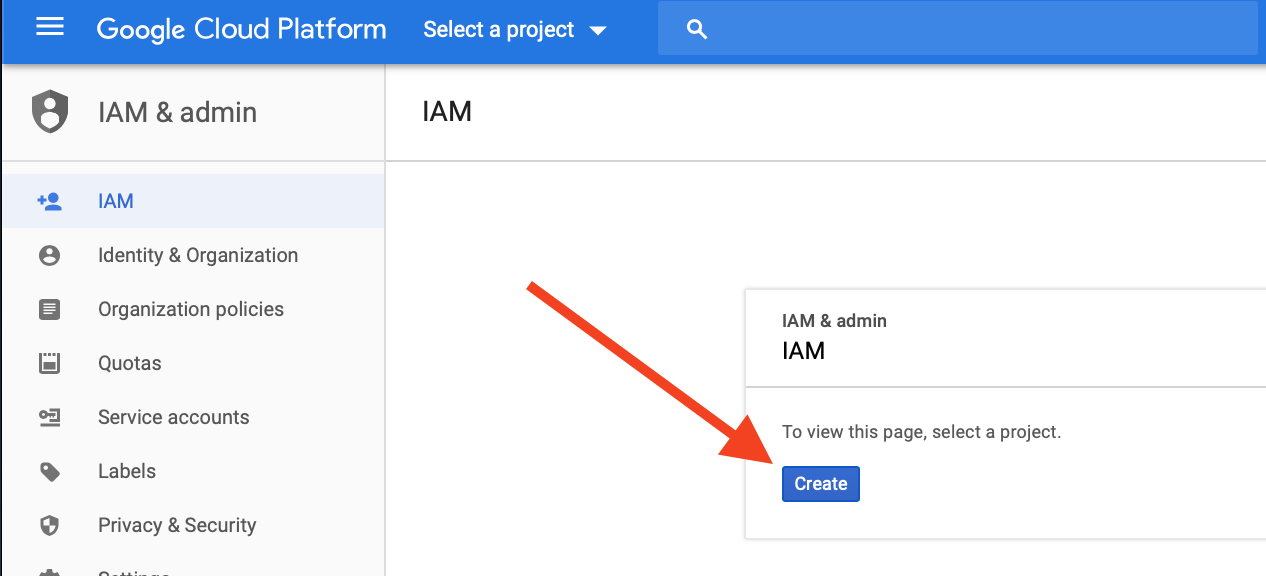
- To create a new project, click Create.
All data in Google Cloud Storage belongs inside a project. A project consists of a set of users, a set of APIs, billing, authentication, and monitoring settings for those APIs. You can have one or multiple projects.
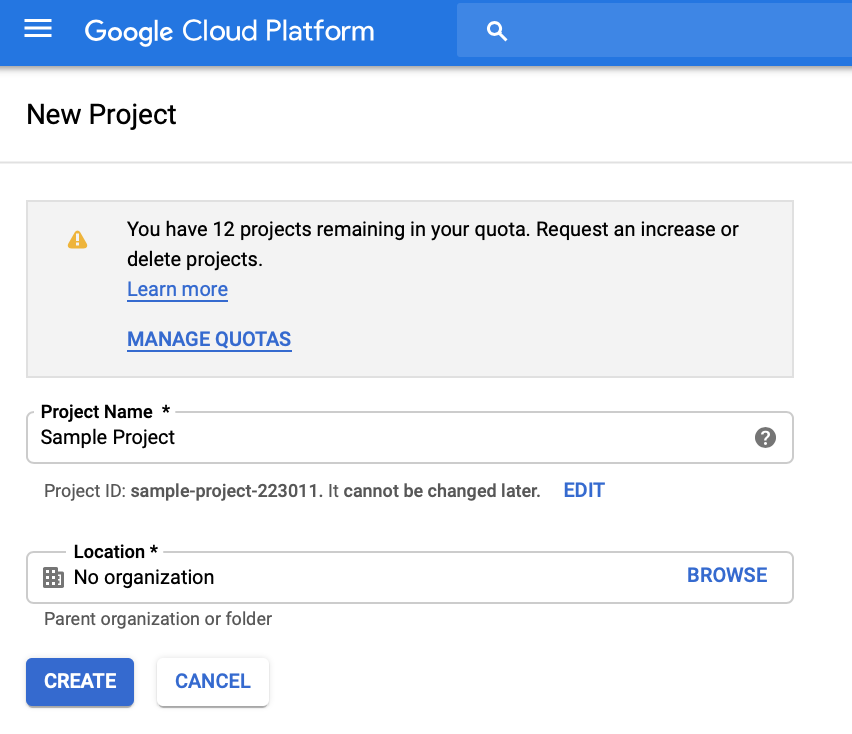
- Specify the name for your project, then click Create.
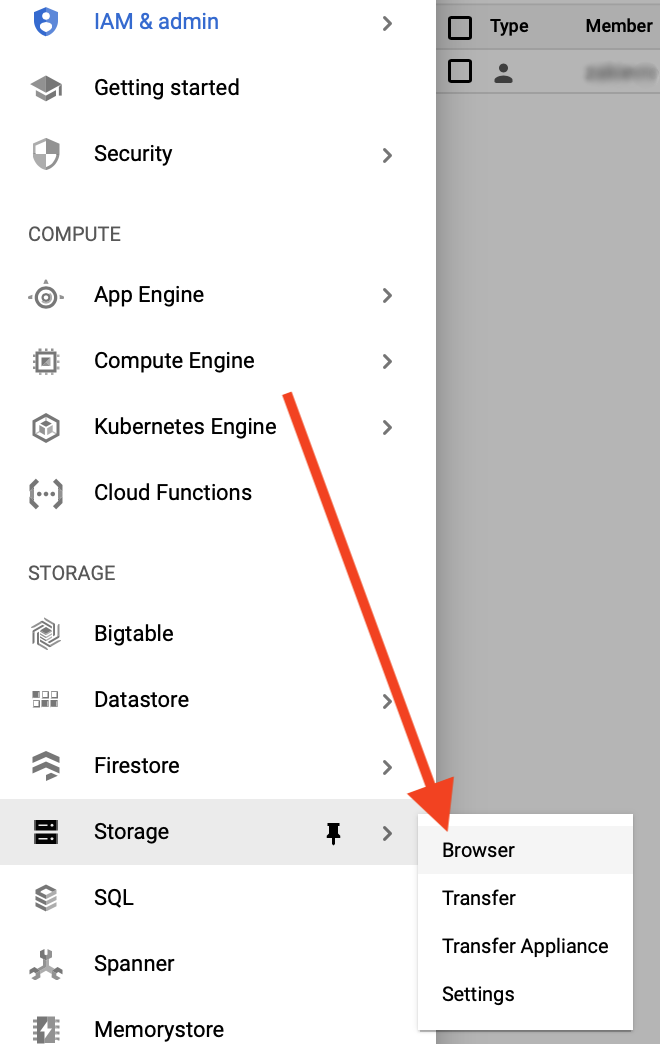
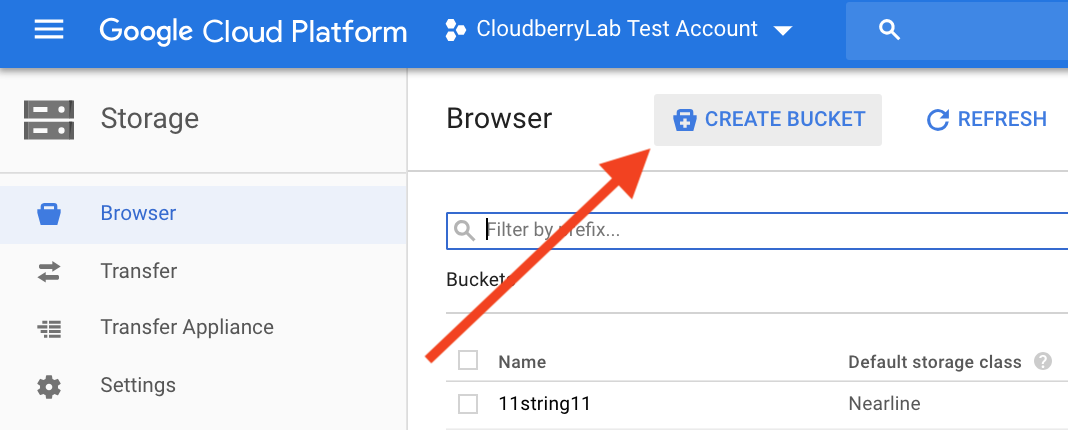
- Once the project is created, you will be able to create your first storage bucket inside this project. Open Storage menu, then click Browser.
- Click Create bucket.
- Specify the bucket name, default storage class, and location, then click Create.
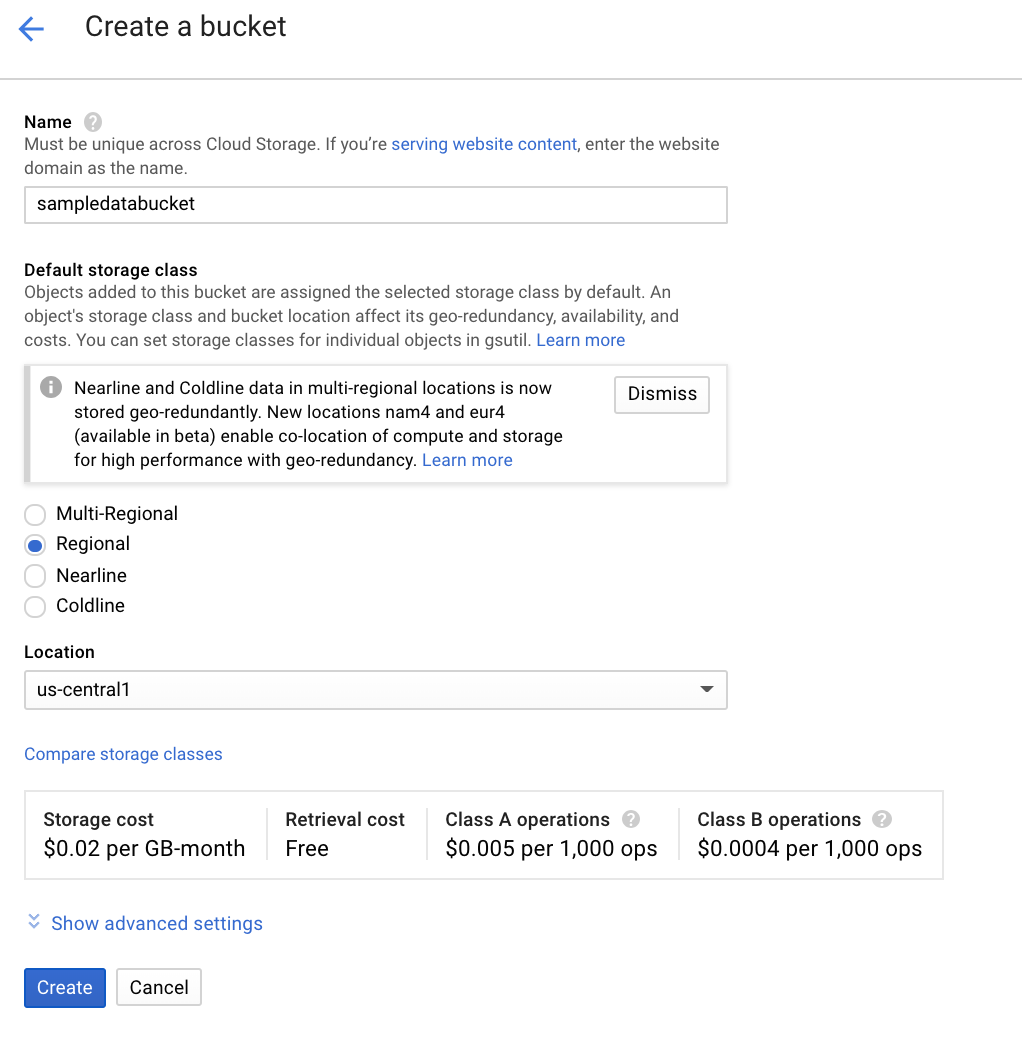
Note: Buckets belong to a particular project and cannot be shared among projects. There is no limit, however, on the number of buckets that you can create within a project.
Preparing a Service Account
To authenticate your application in Google Cloud Storage, you can use your service accounts. A service account's credentials include a generated unique email address, a client ID, and at least one public/private key pair.
To Create a Service Account
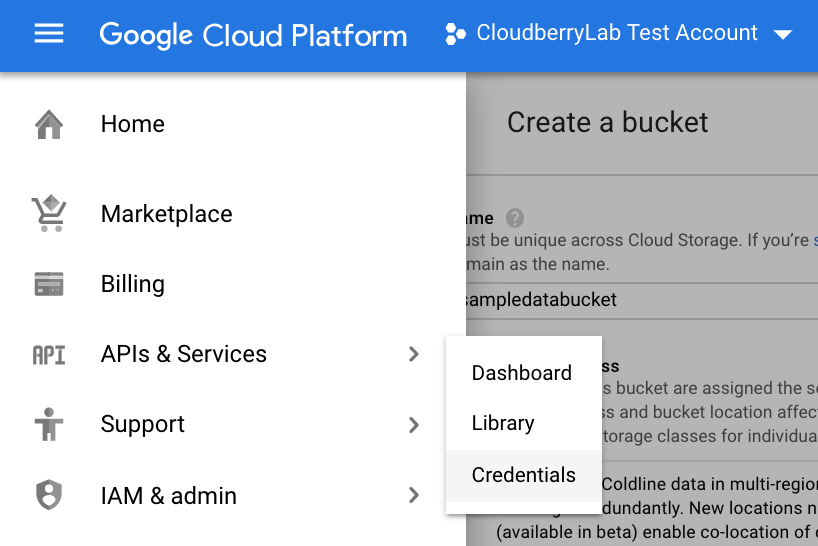
- Open API & Services menu, then click Credentials.
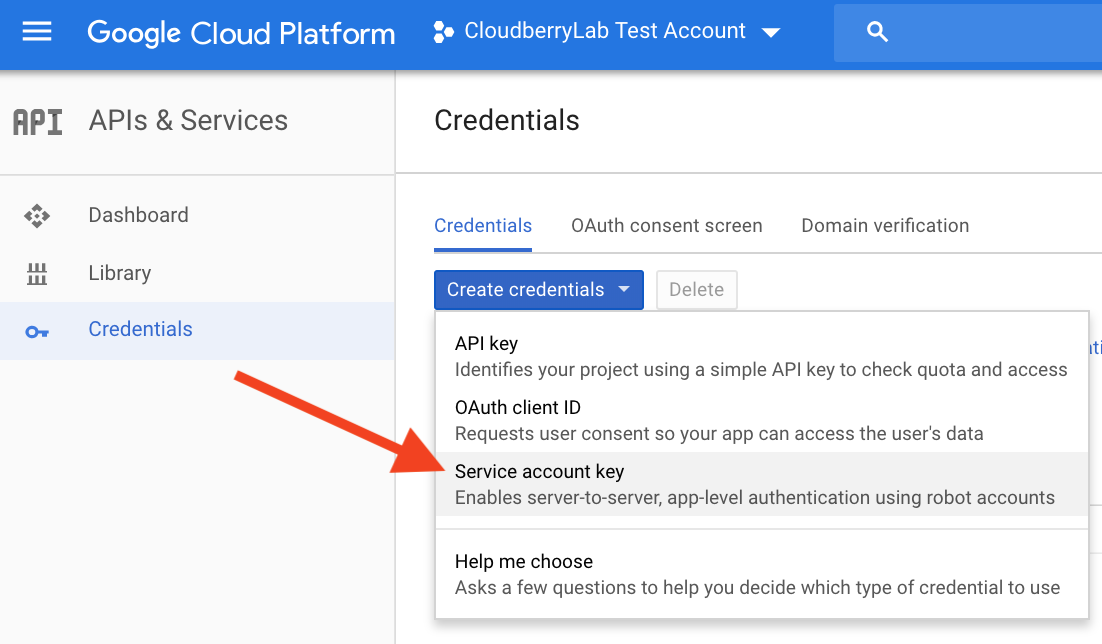
- In the Create credentials drop-down list, select Service account key.
- Specify the service account and the key type, then click Create.
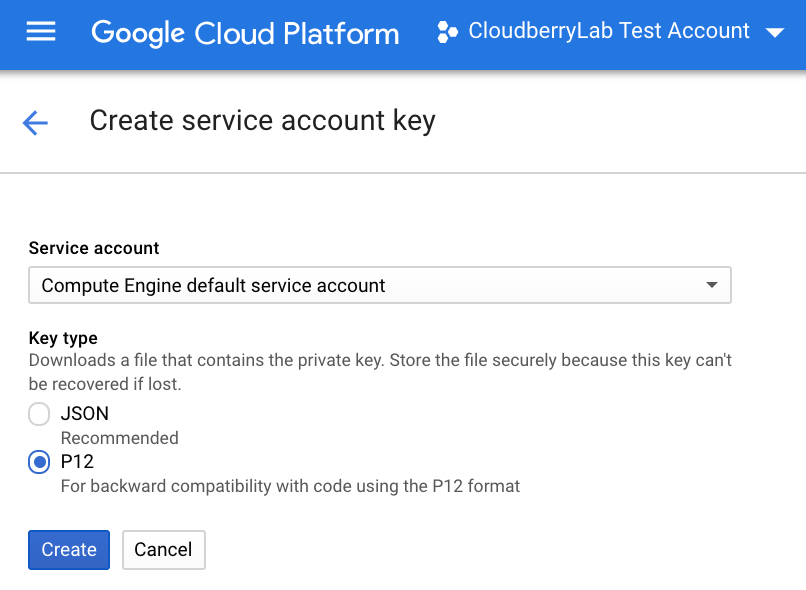
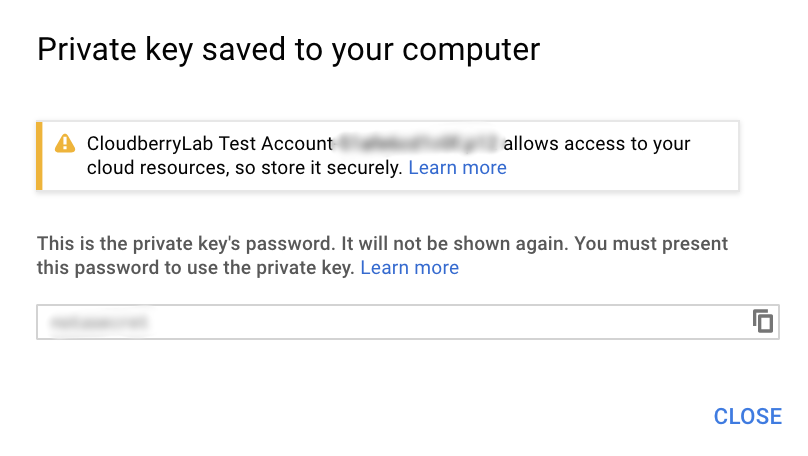
- The public key will be downloaded. The private key's password will be shown in a pop-up window. It is recommended to write the private key down and keep it in a safe place.
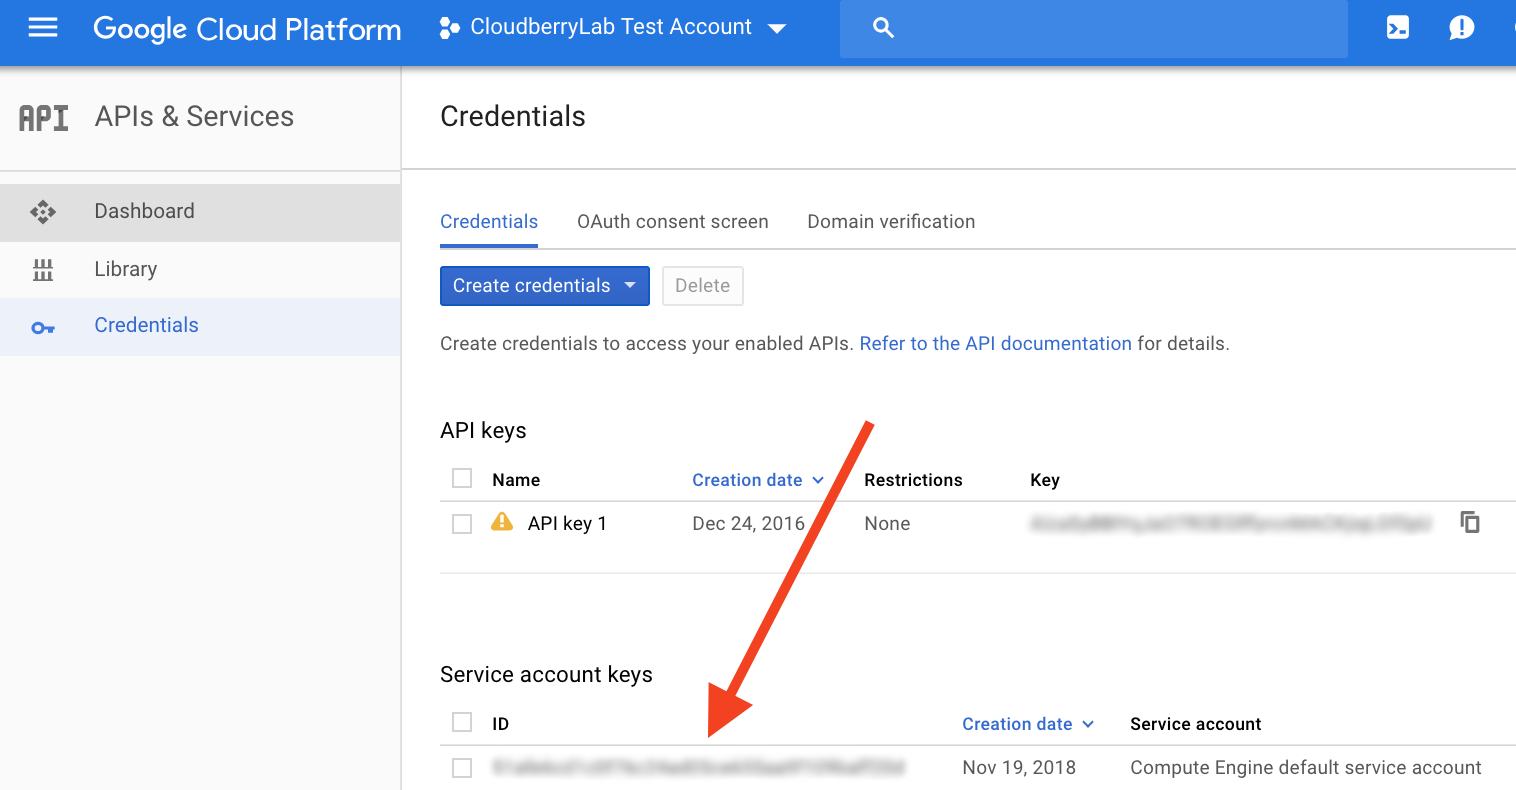
In addition, the service account information will also be displayed in the Credentials Dashboard.
- The sign-up is done. To learn more about addning a cloud storage, refer to Adding a Cloud Storage chapter.